How it Works
1. Creating Actor Images
The first step to creating amazing animations is generating actor images that you can then animate.
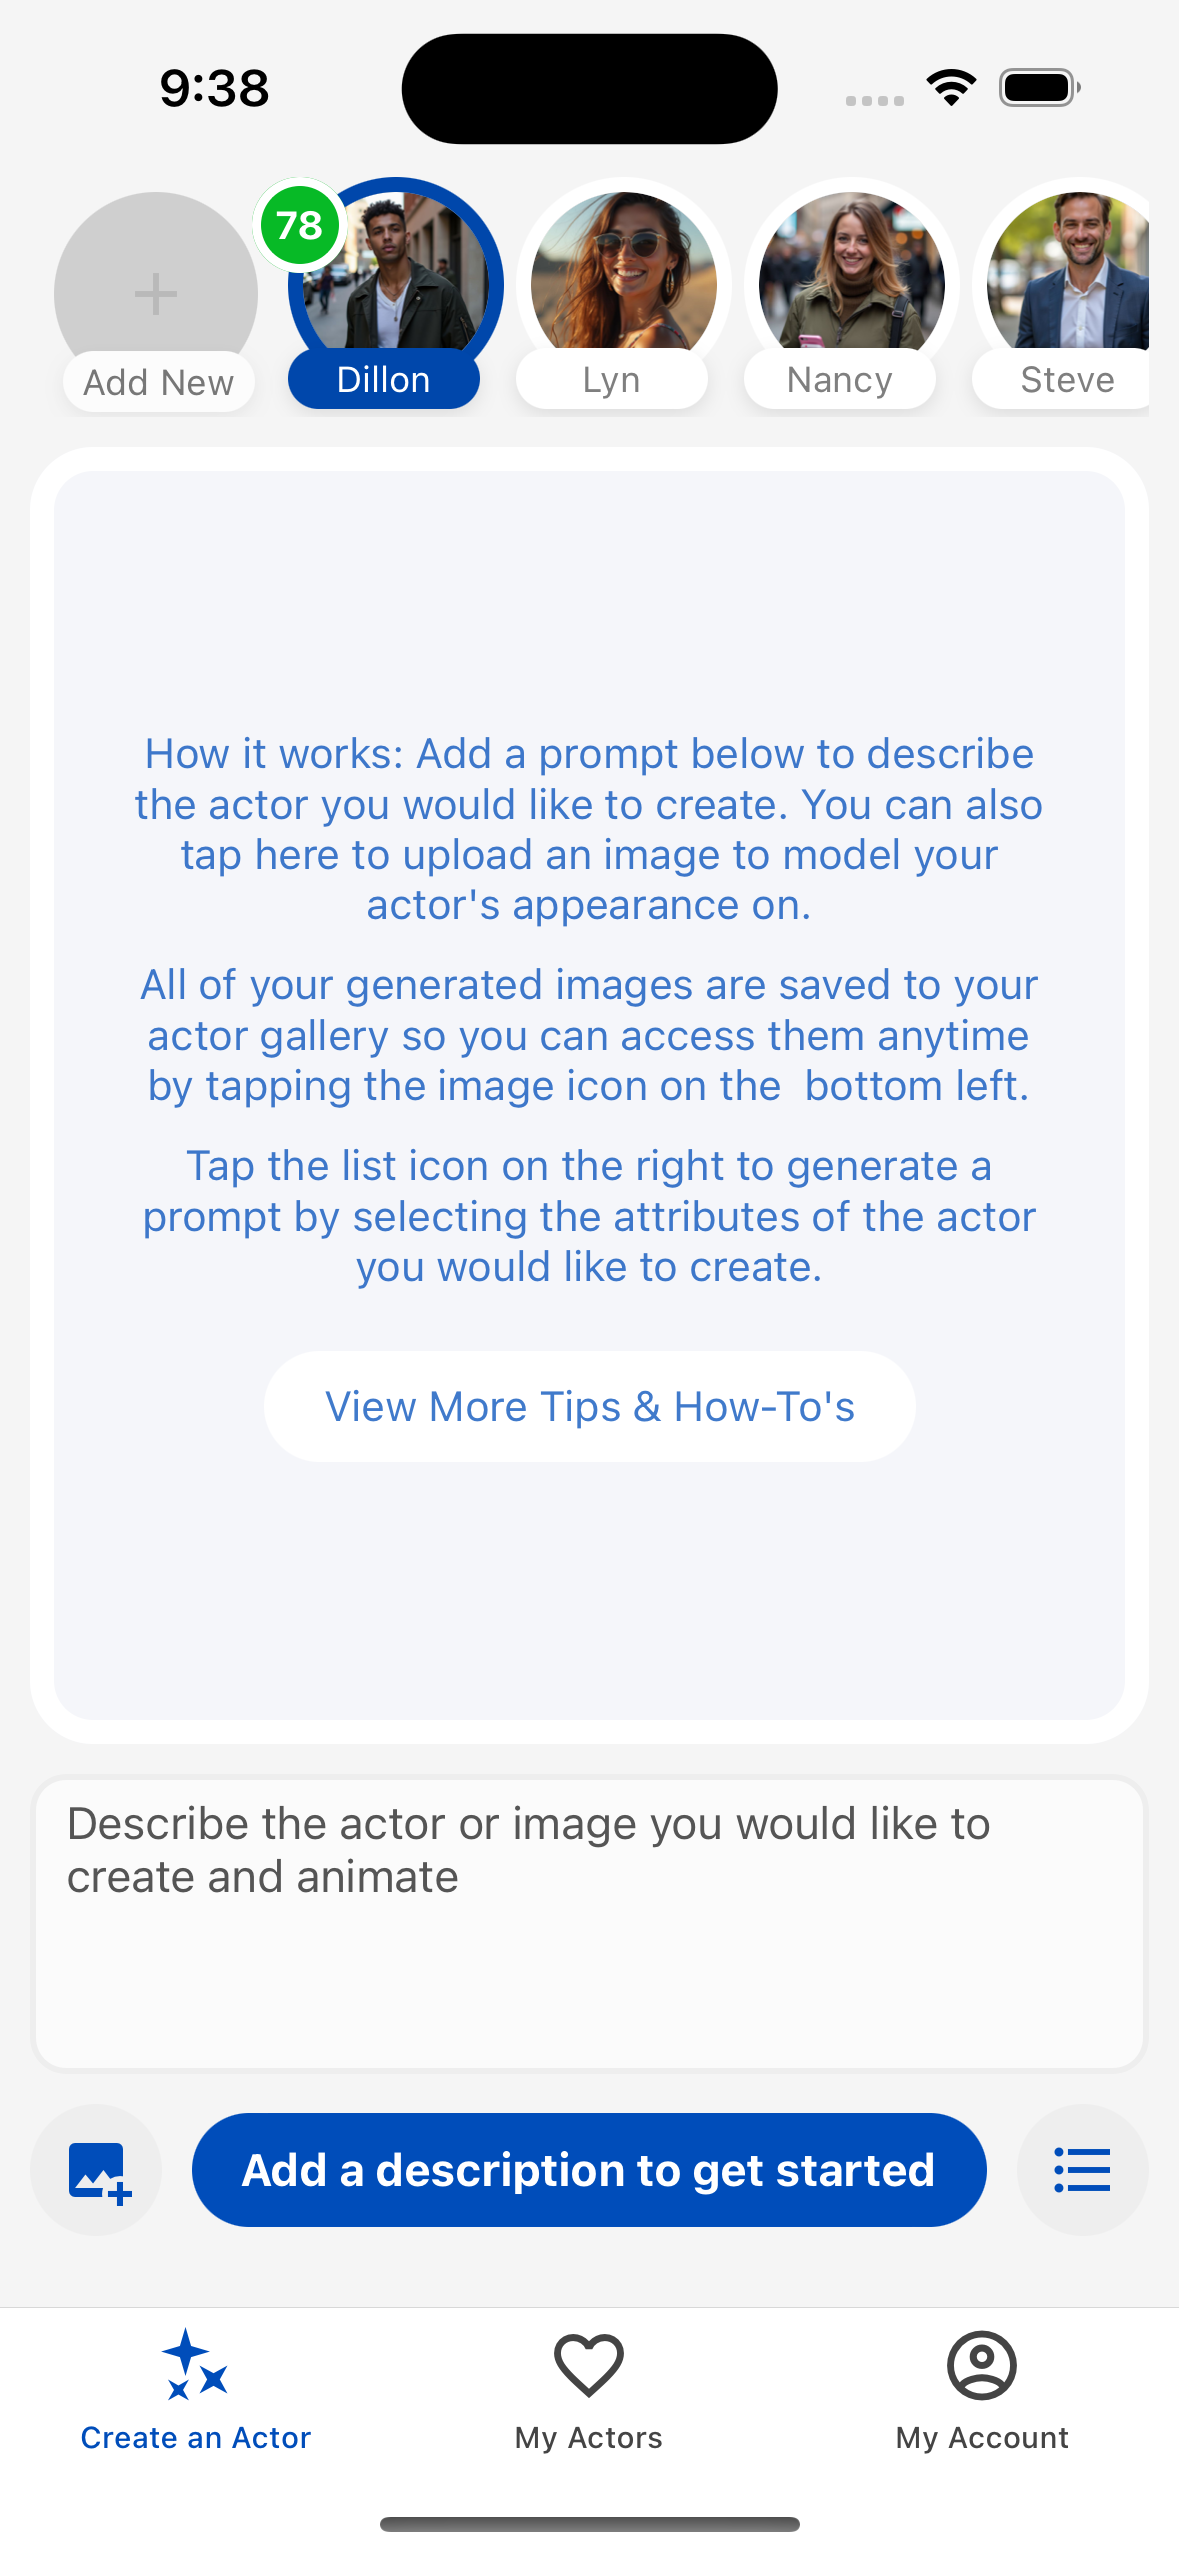
Method 1: Using Text Prompt
- Enter a detailed description of the actor you want to create in the text input field
- Tap the Generate Images button
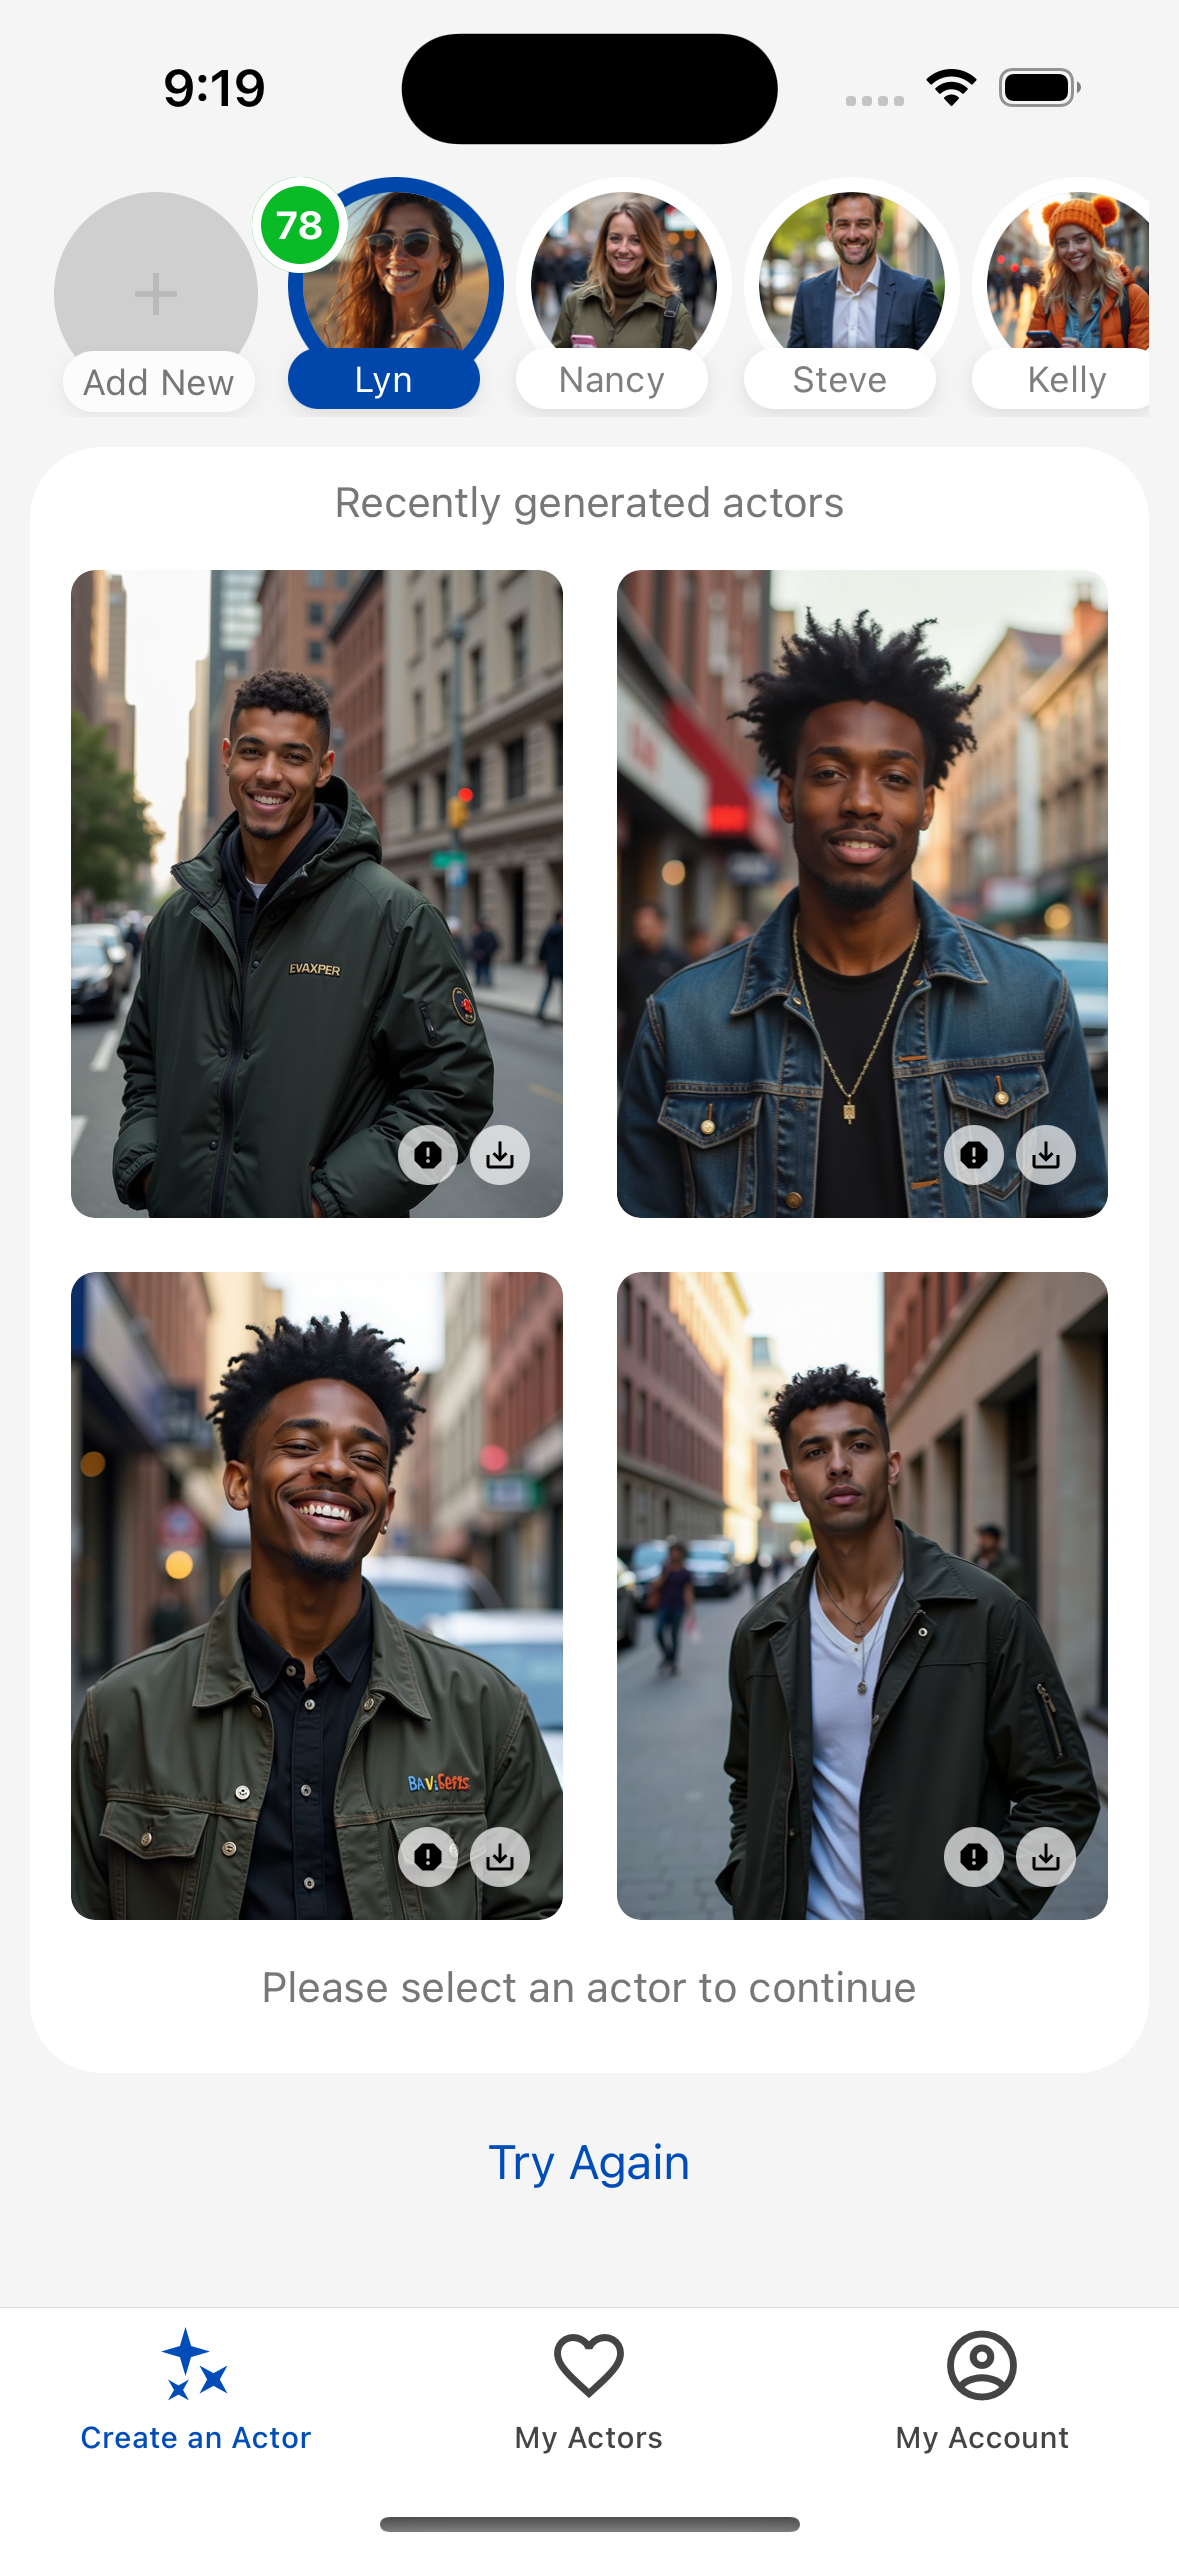
- Wait for the AI to generate up to 4 actor images based on your description
- Select your favorite image to continue
Method 2: Using Attribute Selection
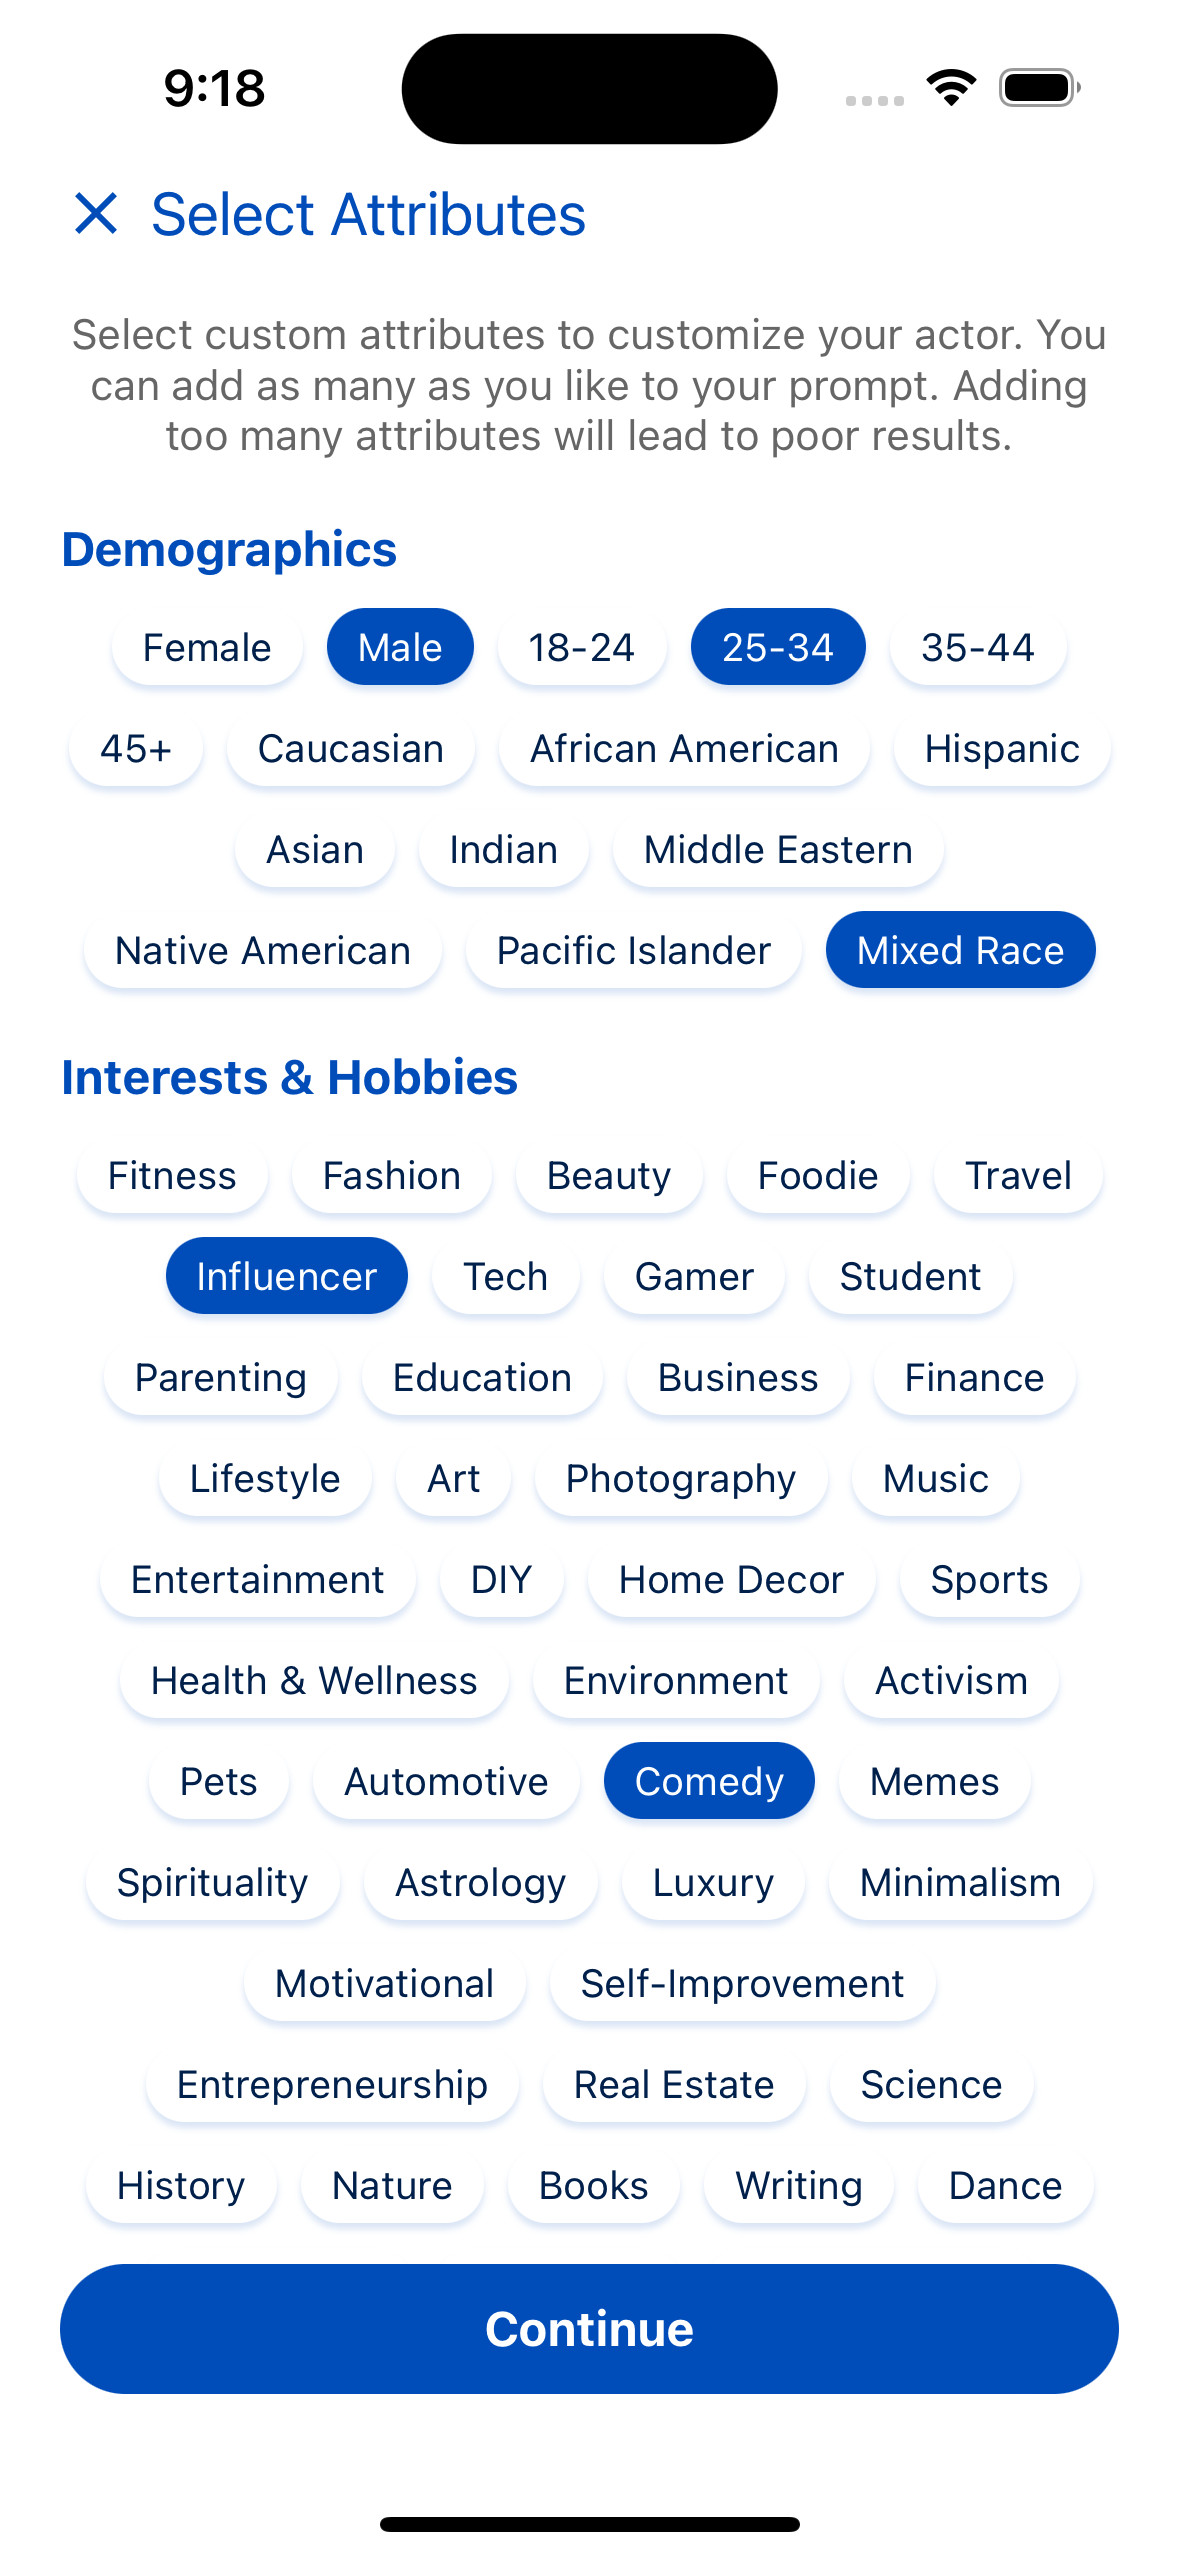
- Tap the list icon ☰ next to the Generate Images button
- Select as many attributes as you want that describe your desired actor
- Tap Save to apply the attributes
- The attributes will be combined into a prompt automatically
- Tap Generate Images to create your actor
Method 3: Using Your Own Image
- Tap the upload area or the image-plus icon to select a saved image.
- Select an image from your device's gallery
- The image will be uploaded and prepared for animation
Tips for best results:
- Be specific about physical features, clothing, and background
- Use descriptive adjectives (e.g., "professional", "cheerful")
- Mention the desired lighting and camera angle
- Specify if you want a particular style (e.g., "photorealistic", "cartoon")
2. Saving an Actor
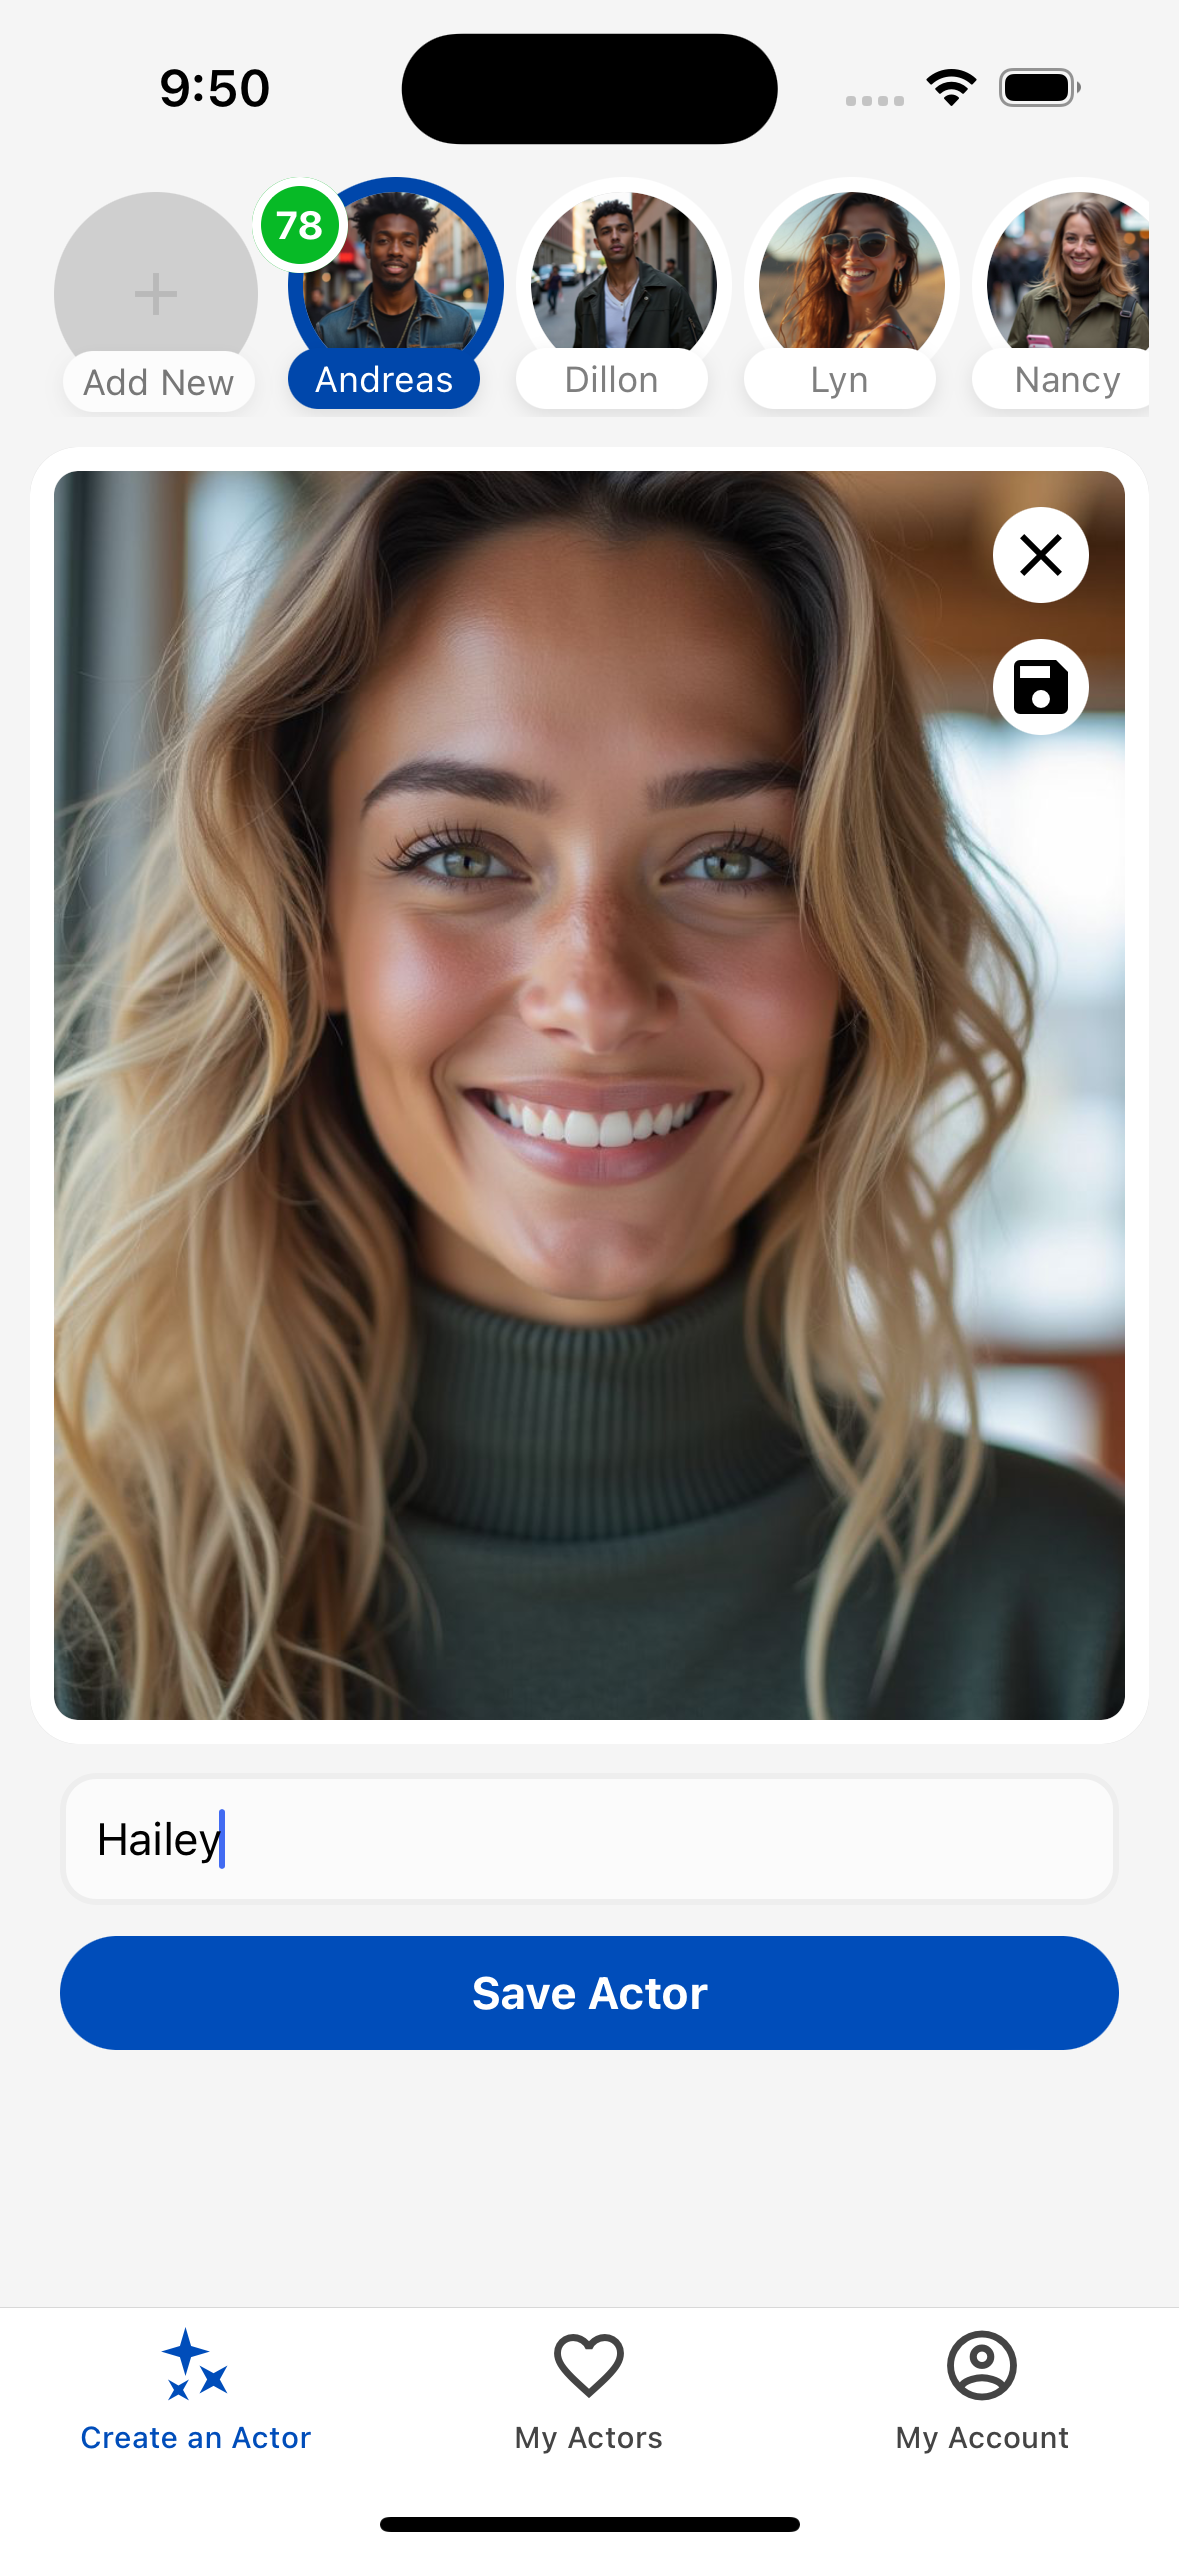
After creating or selecting an actor image, you can save it to your collection for future use.
- Select one of your generated images or upload your own
- Enter a name for your actor in the "Name your actor" field
- Tap the Save Actor button
- Your actor will be saved to your account and can be accessed anytime
Note: Saving actors allows you to quickly access them later without having to recreate them. You can build a library of different actors for various purposes.
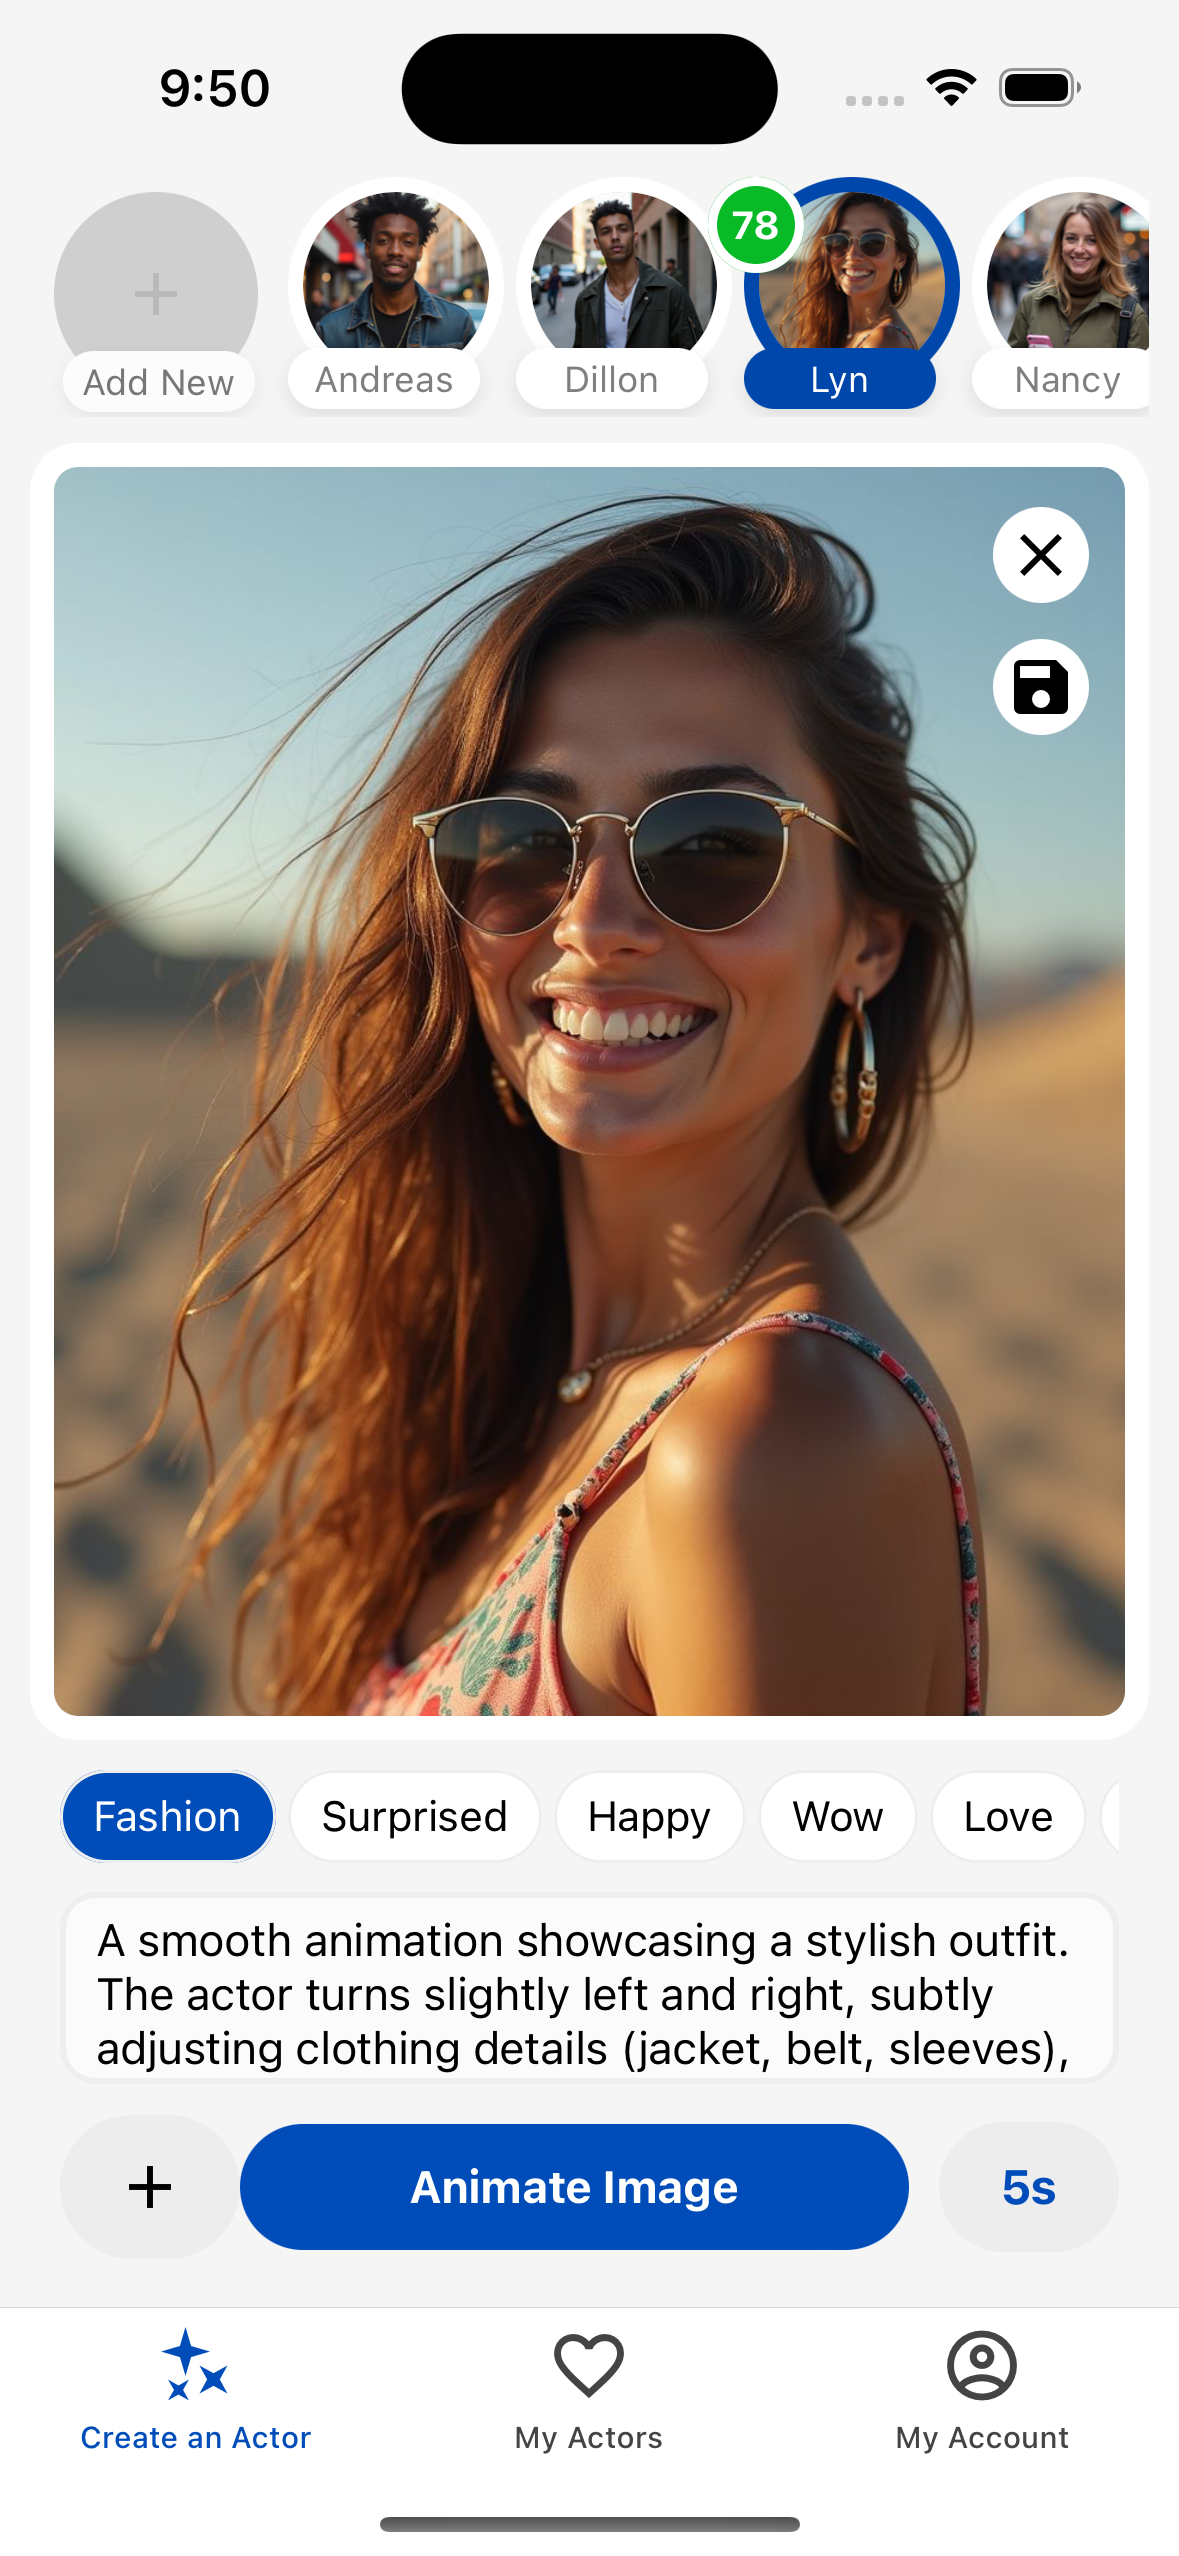
3. Animating an Actor
Turn your static actor images into dynamic videos with realistic movements.
- Select or create an actor image
- Choose an emotion from the horizontal scrolling list (e.g., Happy, Serious, Surprised)
- Optionally, add a custom description in the prompt field to guide the animation
- Set the video duration (5s or 10s) using the duration toggle
- Tap the Animate Image button
- Wait for the AI to generate your animation (this may take a few minutes)
Animation Tips:
- Different emotions create different expressions and movements
- More detailed prompts lead to more specific animations
- For presentations, choose the "Serious" or "Professional" emotions
- For entertaining content, try "Happy" or "Surprised" emotions
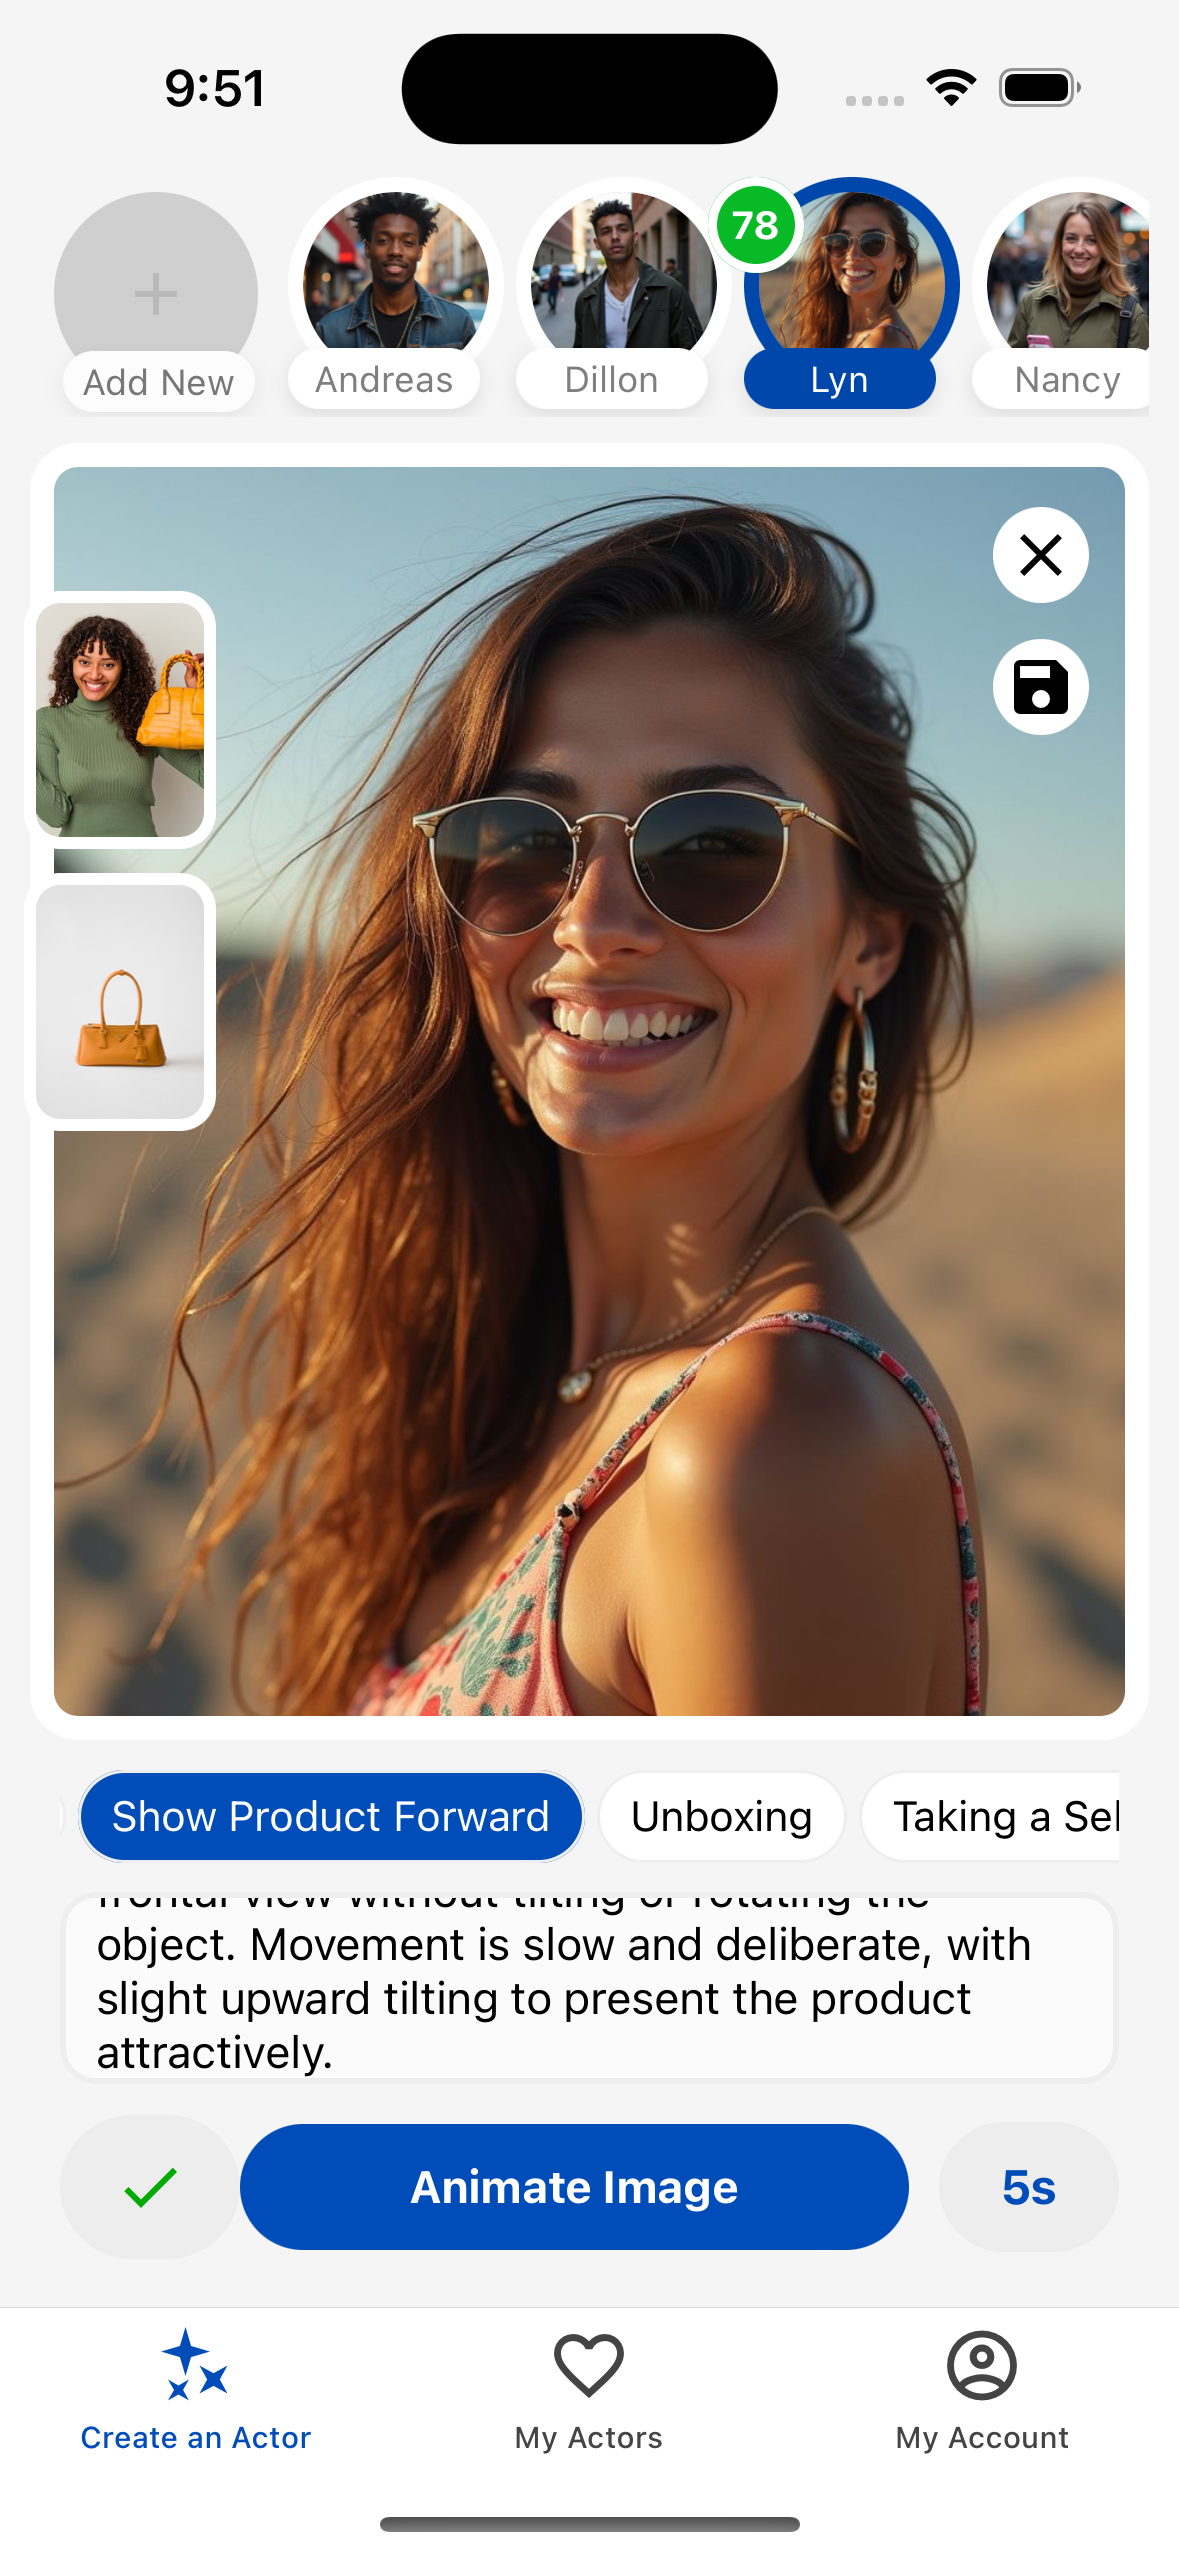
4. Animating with Product or Extra Images
Include products, environments, or other people in your animated videos.
- Select or create an actor image
- Tap the + button on the left side of the Animate button
- Select "Add Images" from the dialog
- Choose up to 3 product/environment/people images from your gallery
- The selected images will appear as thumbnails on the left side of your actor
- Customize your animation description if needed
- Tap Animate Image to create your video
Best practices for product images:
- Use clear, high-quality images of your products
- Choose images with simple backgrounds for best integration
- For environments, select images that match the mood of your video
- When adding other people, try to match the style of your main actor
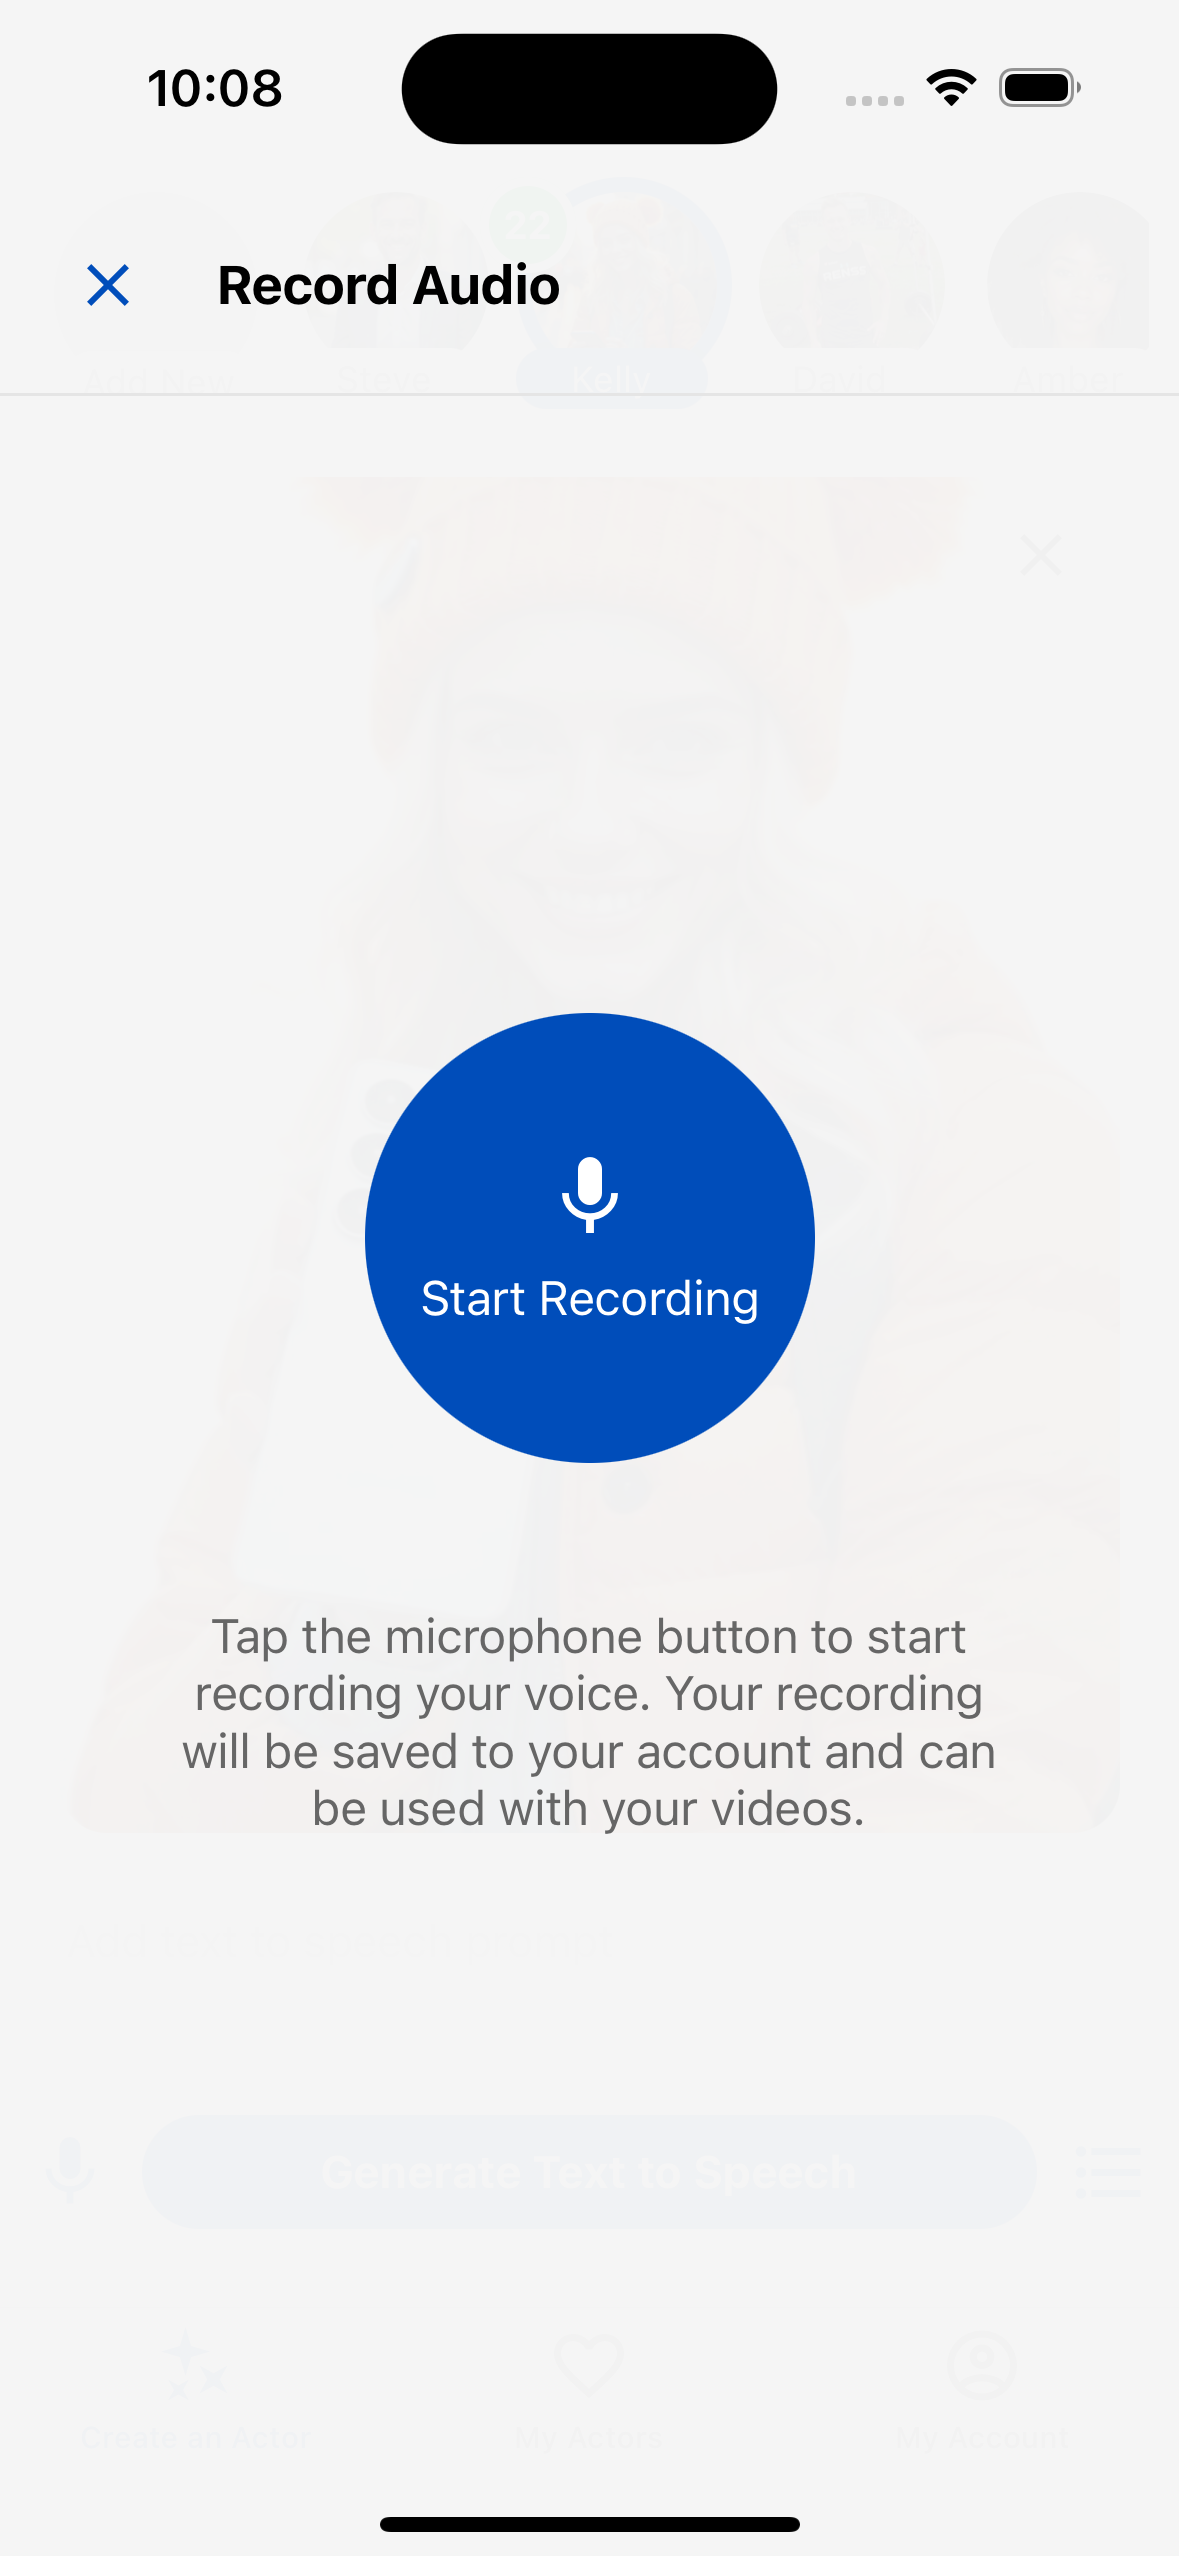
5. Recording Audio for Your Videos
Add your own voice to make your animations even more personalized.
- After creating a video, tap the Add Voice-to-Video button
- Tap the microphone icon 🎤
- In the recording modal, tap the record button to start recording
- Speak clearly into your device's microphone
- Tap stop when finished
- Review your recording by playing it back
- If satisfied, tap Use Recording
- If not, tap Record Again
Recording tips:
- Record in a quiet environment to minimize background noise
- Keep your device about 6-12 inches from your mouth
- Speak clearly and at a consistent volume
- Practice your script before recording for smoother delivery
6. Using Text-to-Speech
Don't want to record your own voice? Let AI create professional narration for your videos.
- After creating a video, tap the Add Voice-to-Video button
- Type your script in the text input field
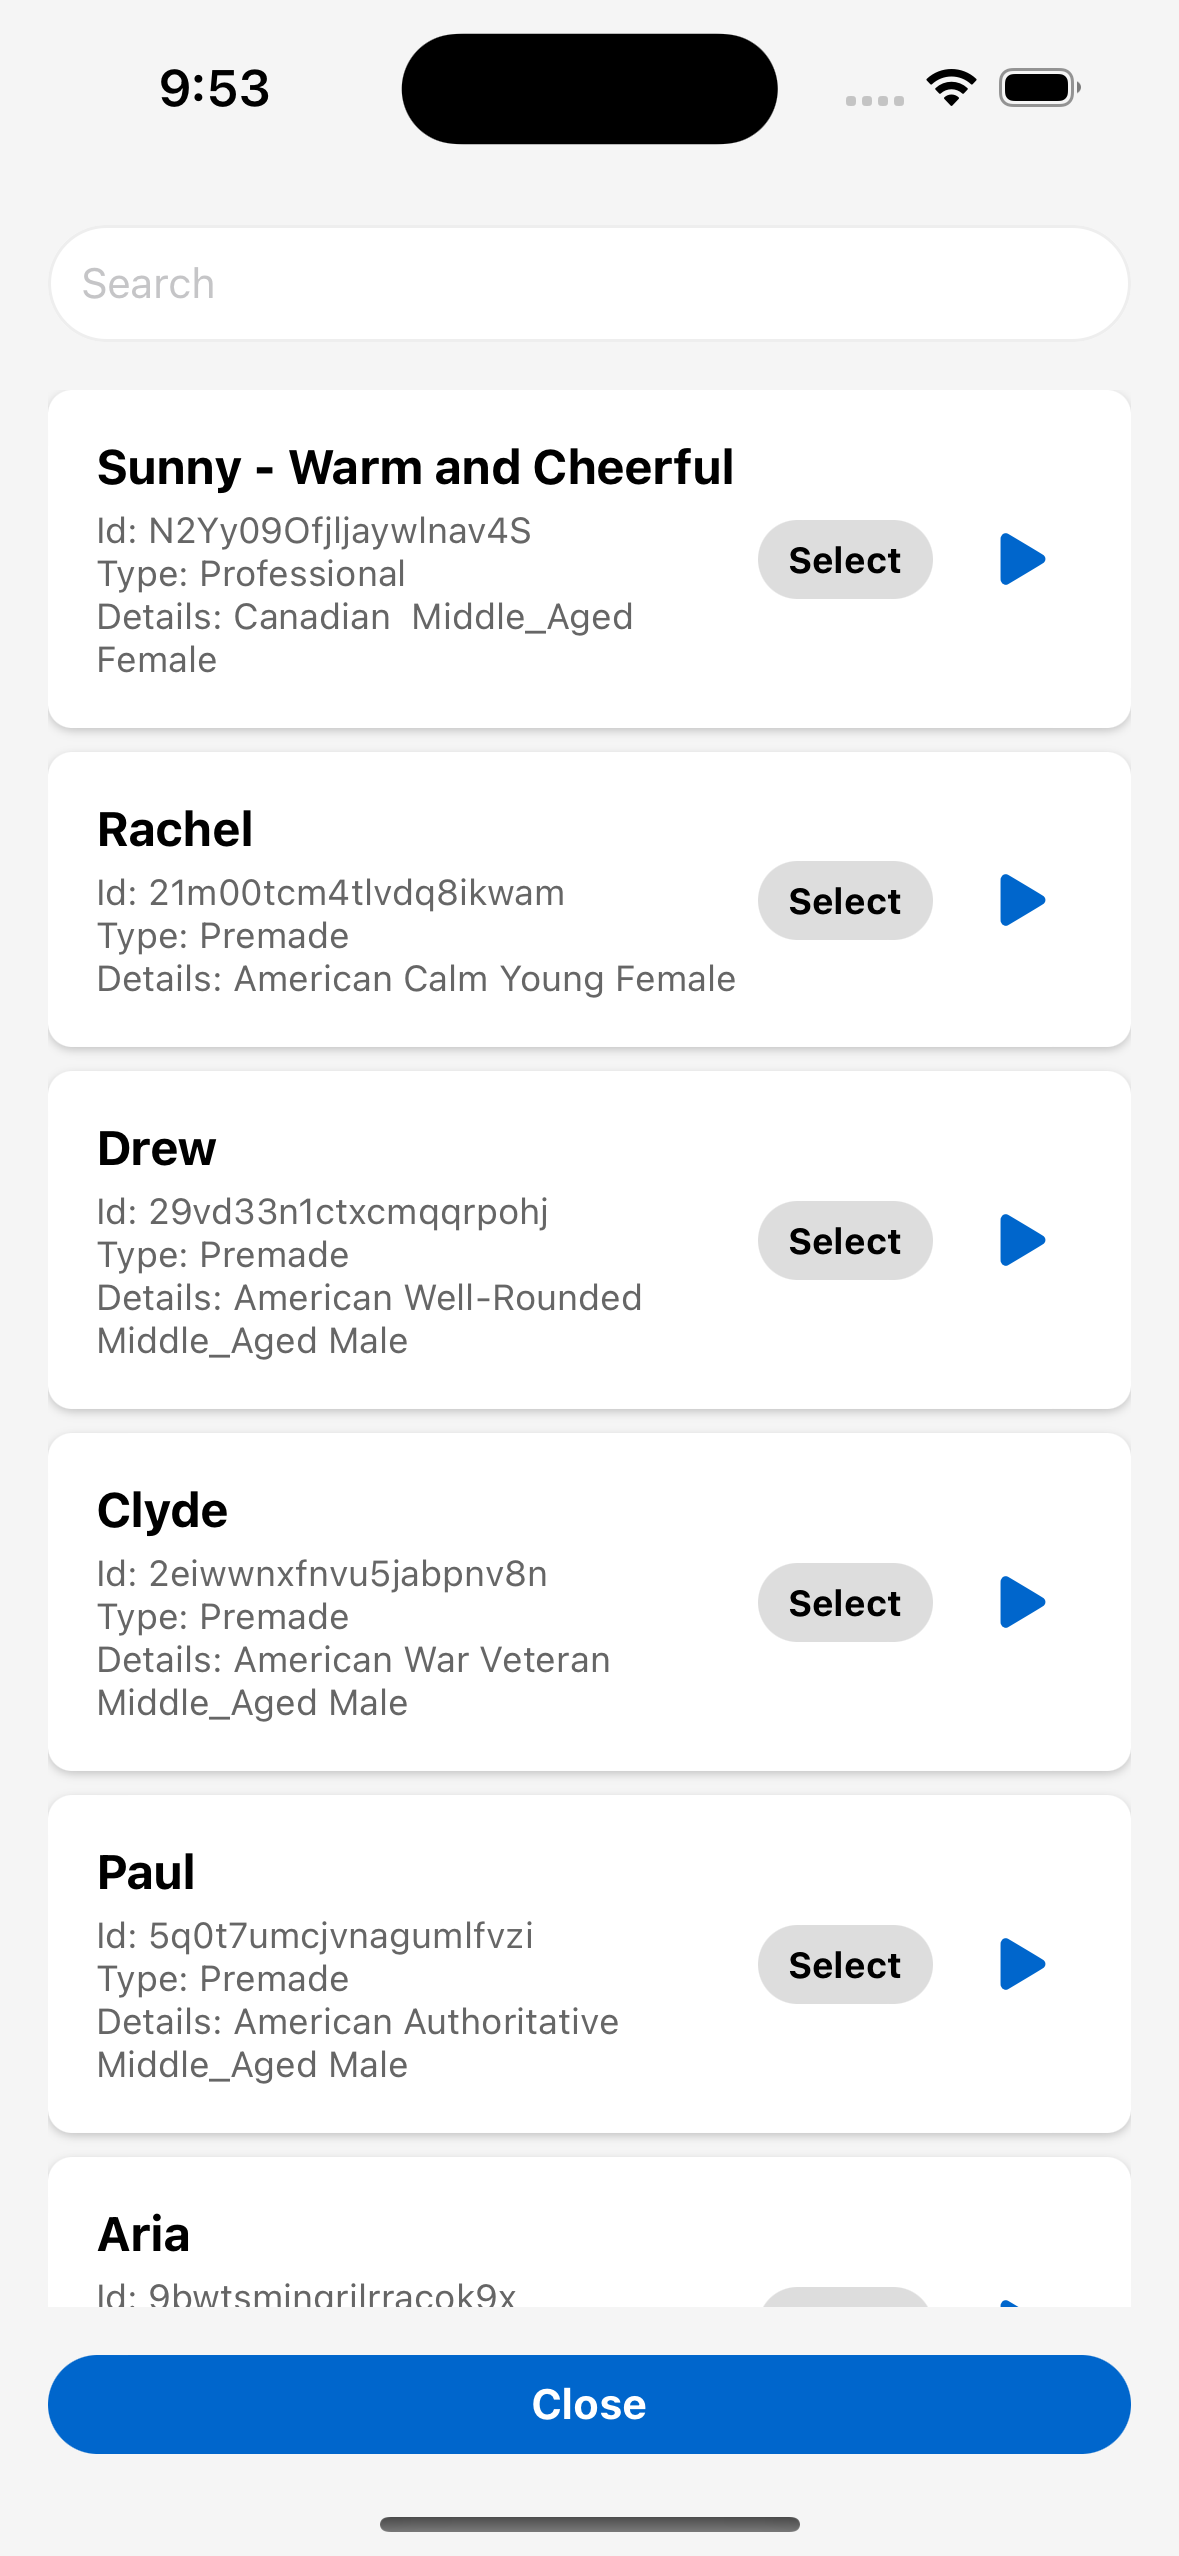
- Tap Select a Voice
- Browse through the available AI voices
- Tap on a voice to preview how it sounds
- Once you've found a voice you like, select it
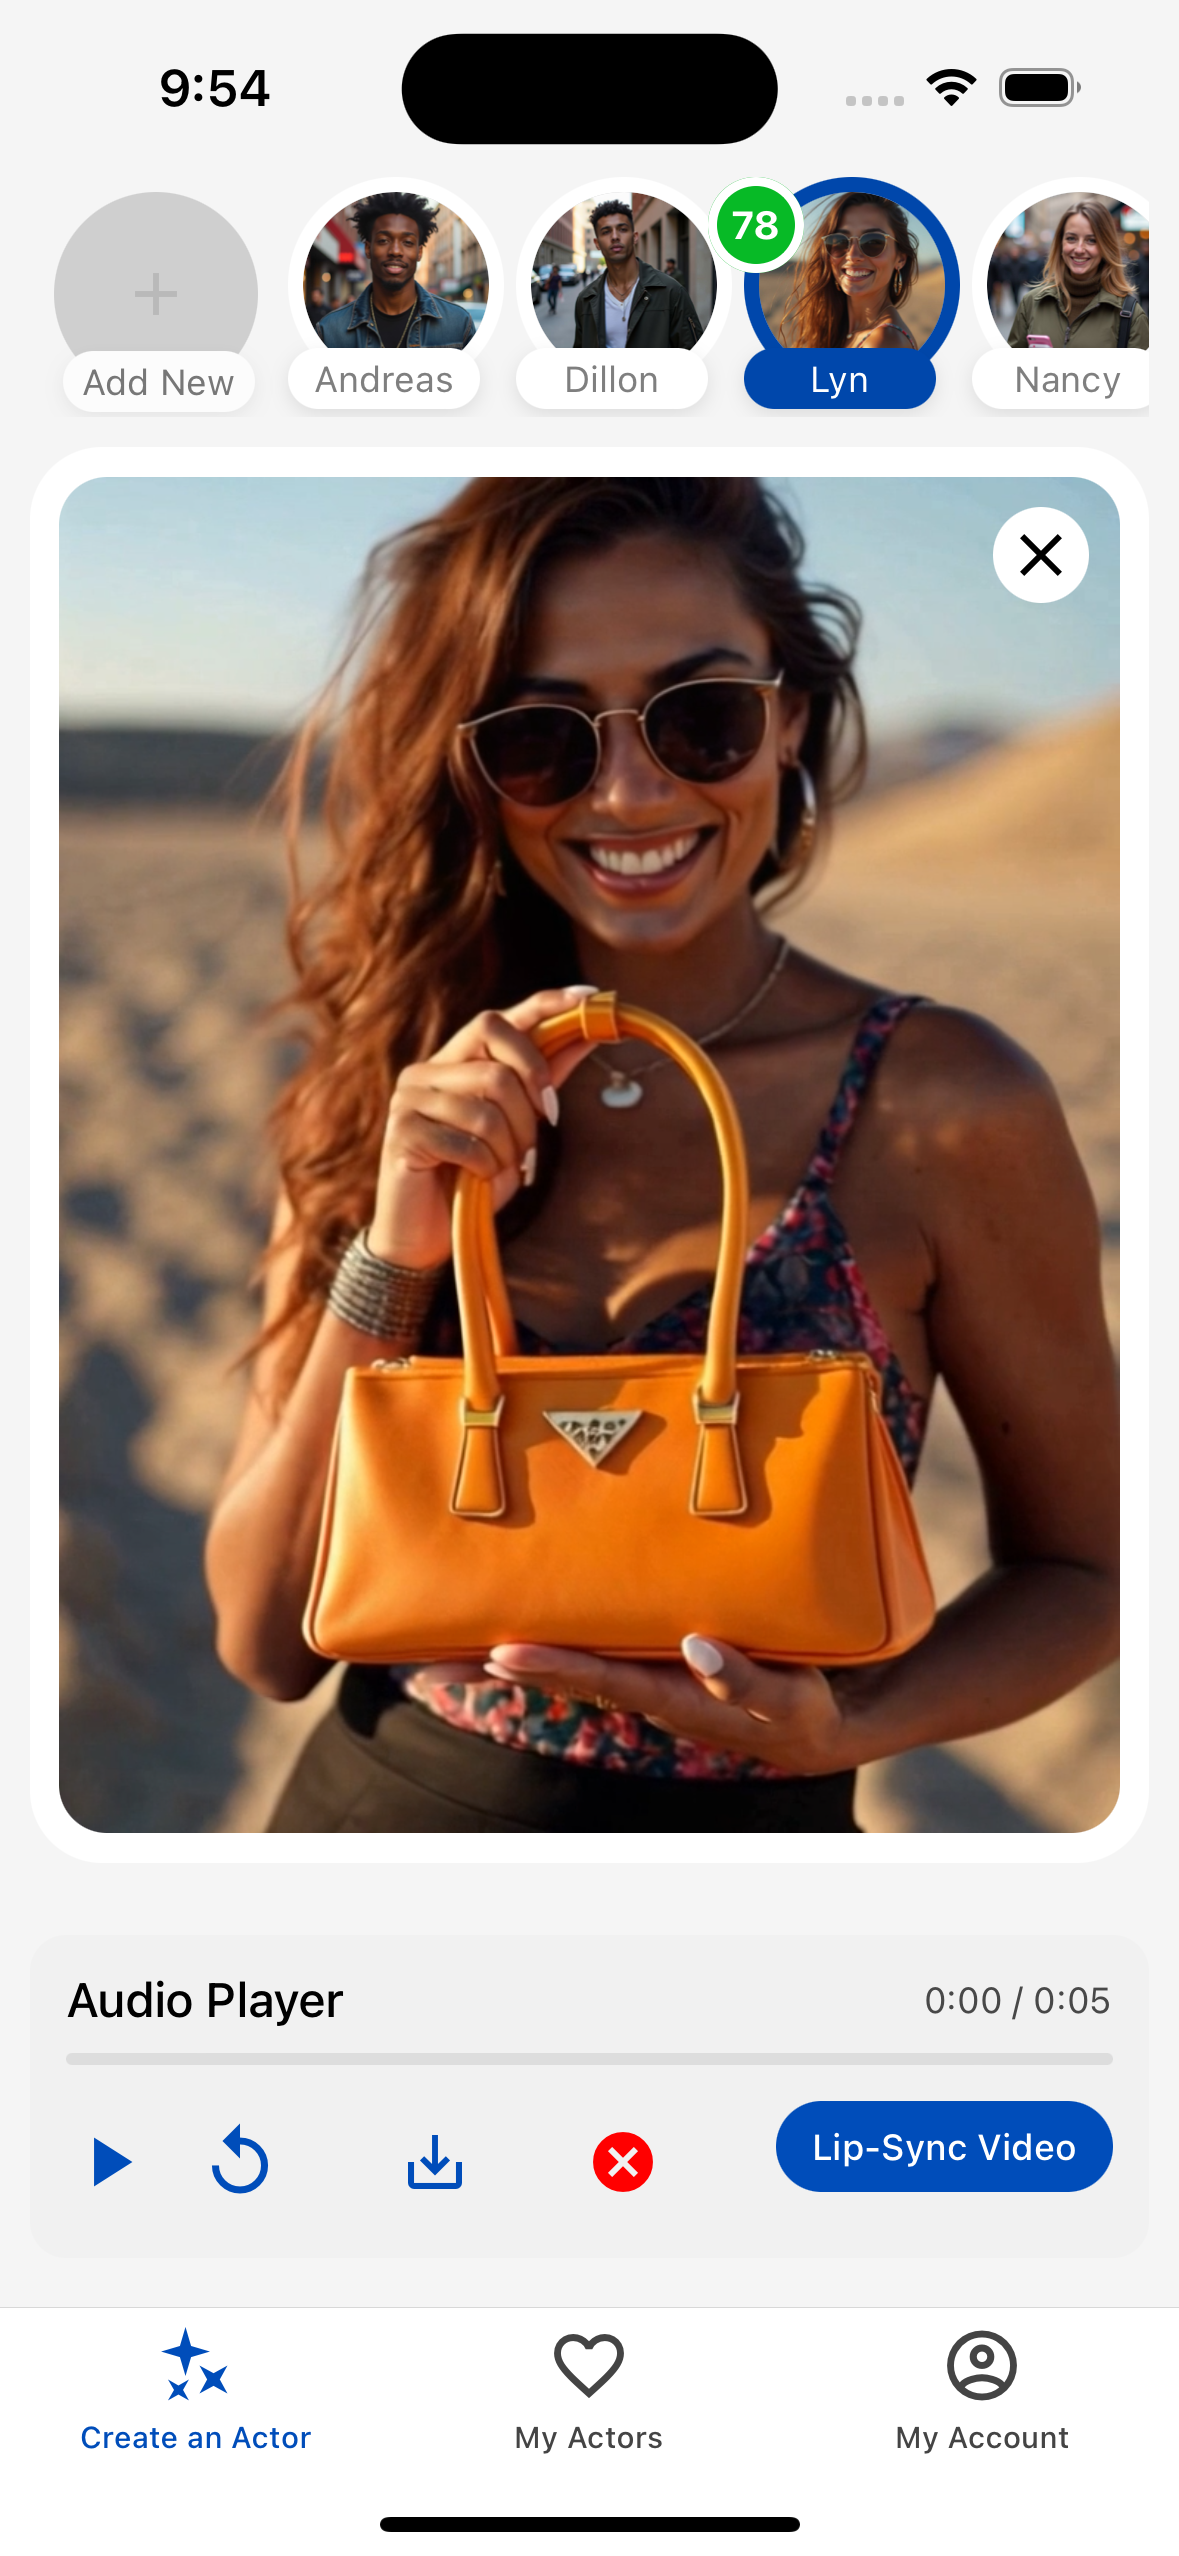
- The system will generate audio from your text
- You can play, pause, and restart the audio using the player controls
Writing effective text-to-speech scripts:
- Keep sentences short and clear for better pronunciation
- Use punctuation to create natural pauses
- Avoid uncommon abbreviations or technical jargon
- Test different voices to find the one that best matches your actor
7. Creating Lip-Sync Videos
Make your actor's mouth movements match your audio for realistic speaking animations.
- Create or select your actor video
- Add audio using either recording or text-to-speech
- Once your audio is ready, tap the Lip-Sync Video button
- The system will process your video and audio to create synchronized lip movements
- Wait for the processing to complete (this may take a few minutes)
- Your lip-synced video will appear once processing is finished
For best lip-sync results:
- Use clear audio with minimal background noise
- Keep sentences at a natural speaking pace
- Choose actor images with clearly visible faces
- For longer scripts, break into smaller segments for better synchronization
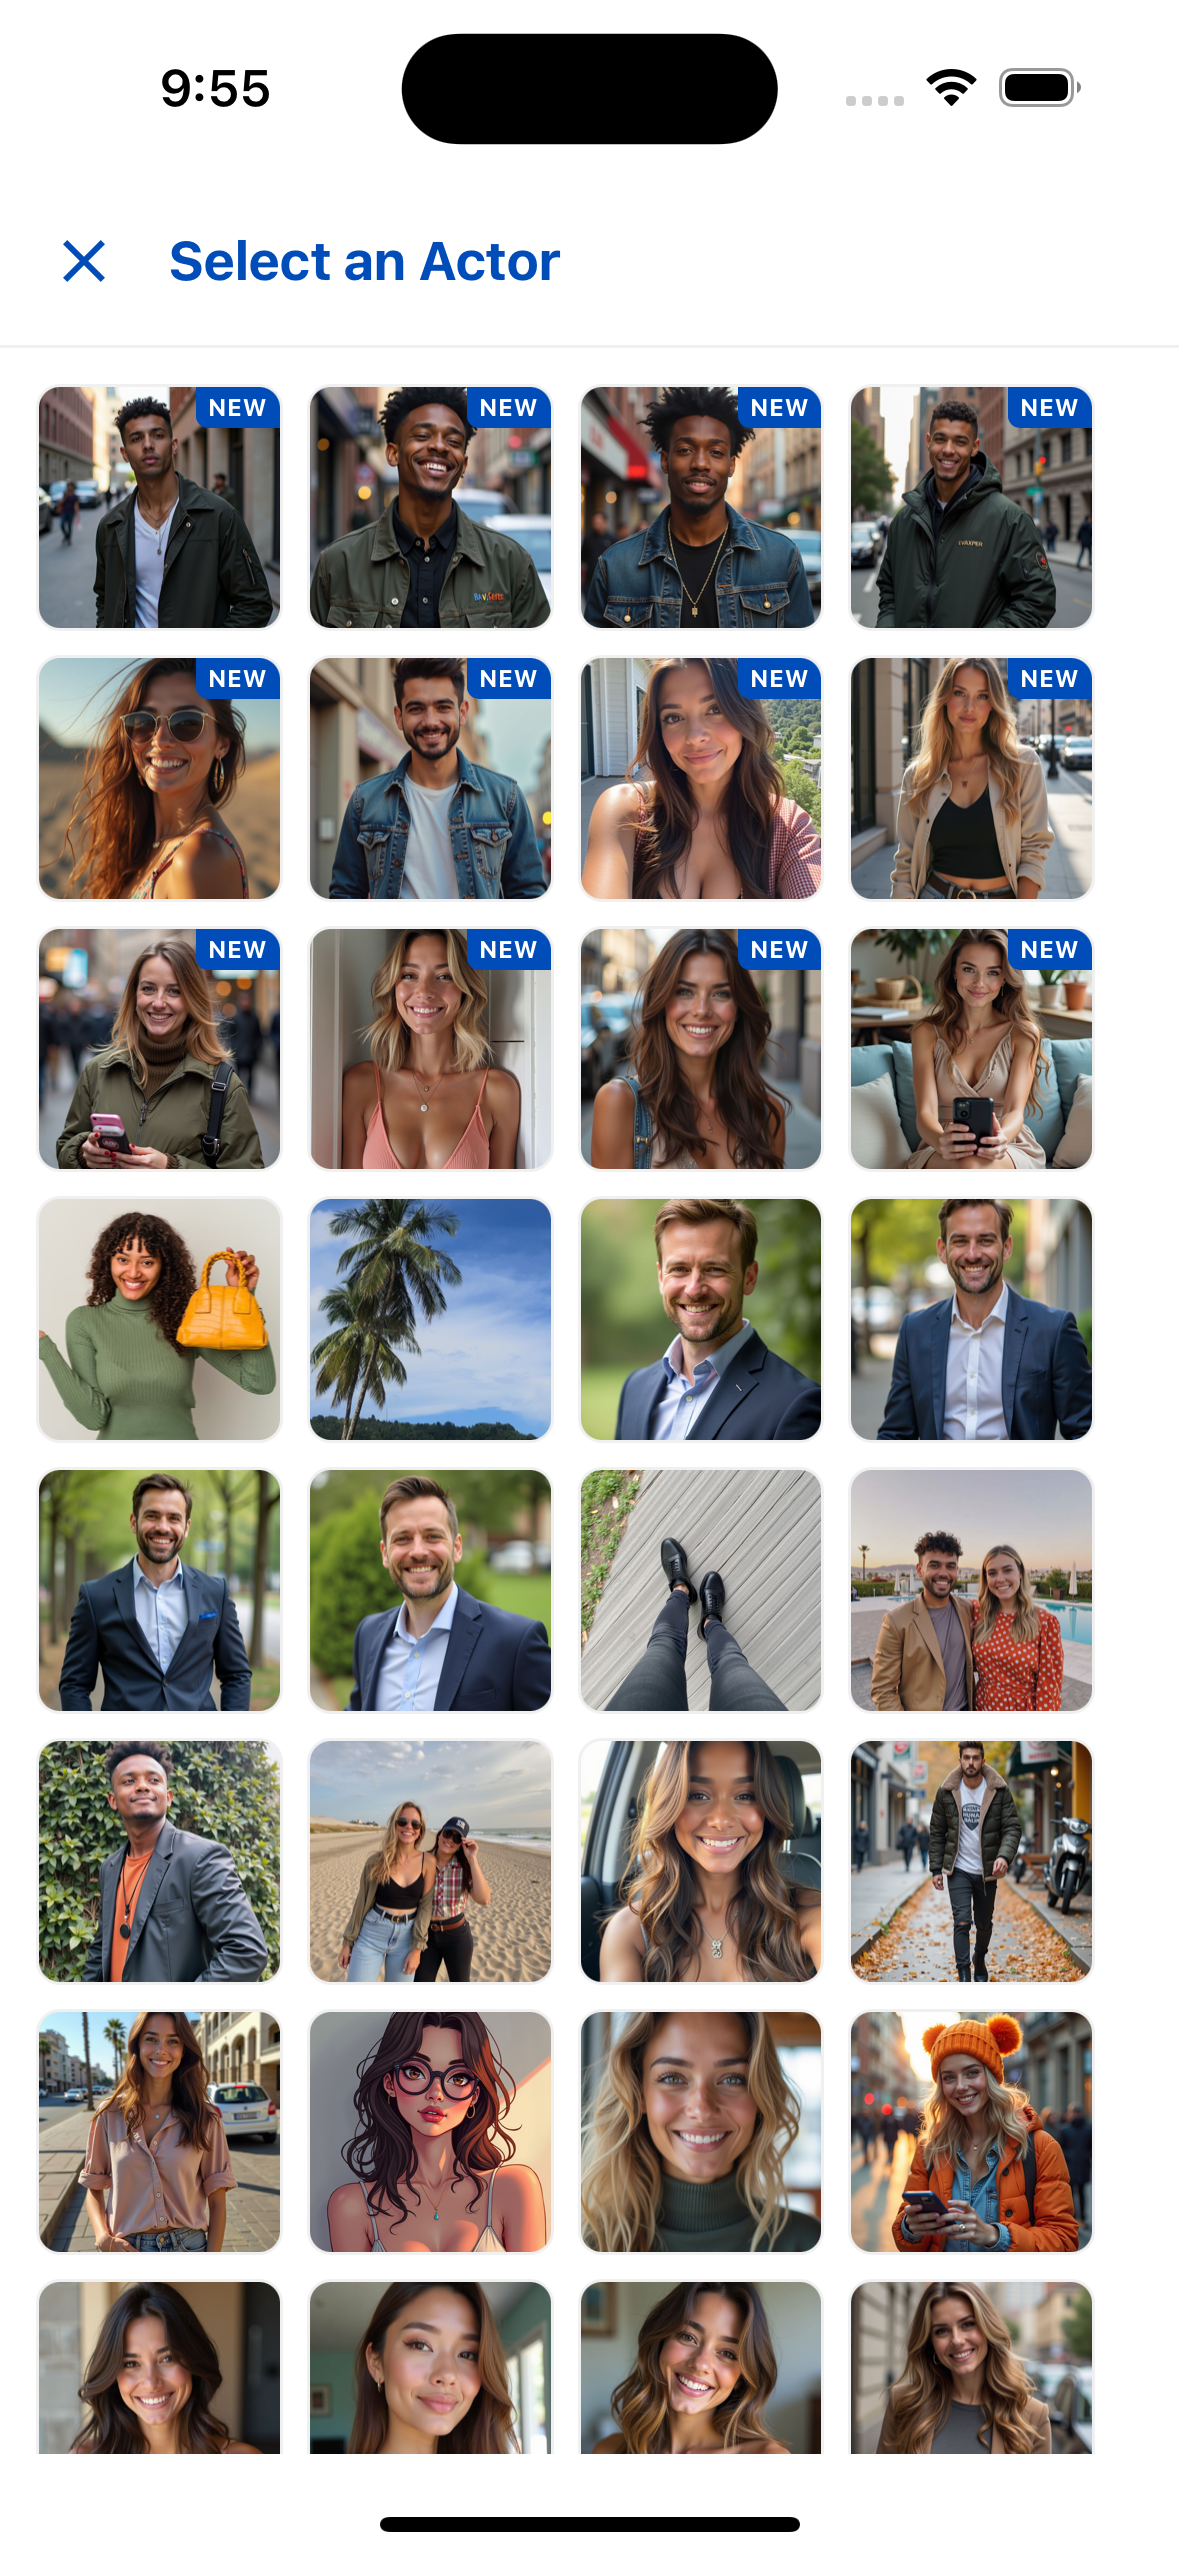
8. Adding an Original Image from Saved Images
Use previously created or saved images to quickly start new projects.
- From the main screen, tap the image icon + below the text input
- The Original Actors Images modal will appear
- Browse through your previously saved images
- Tap on an image to select it
- The selected image will be loaded and ready for animation
Note: This feature lets you reuse images you've already created, saving time and ensuring consistency across your projects.
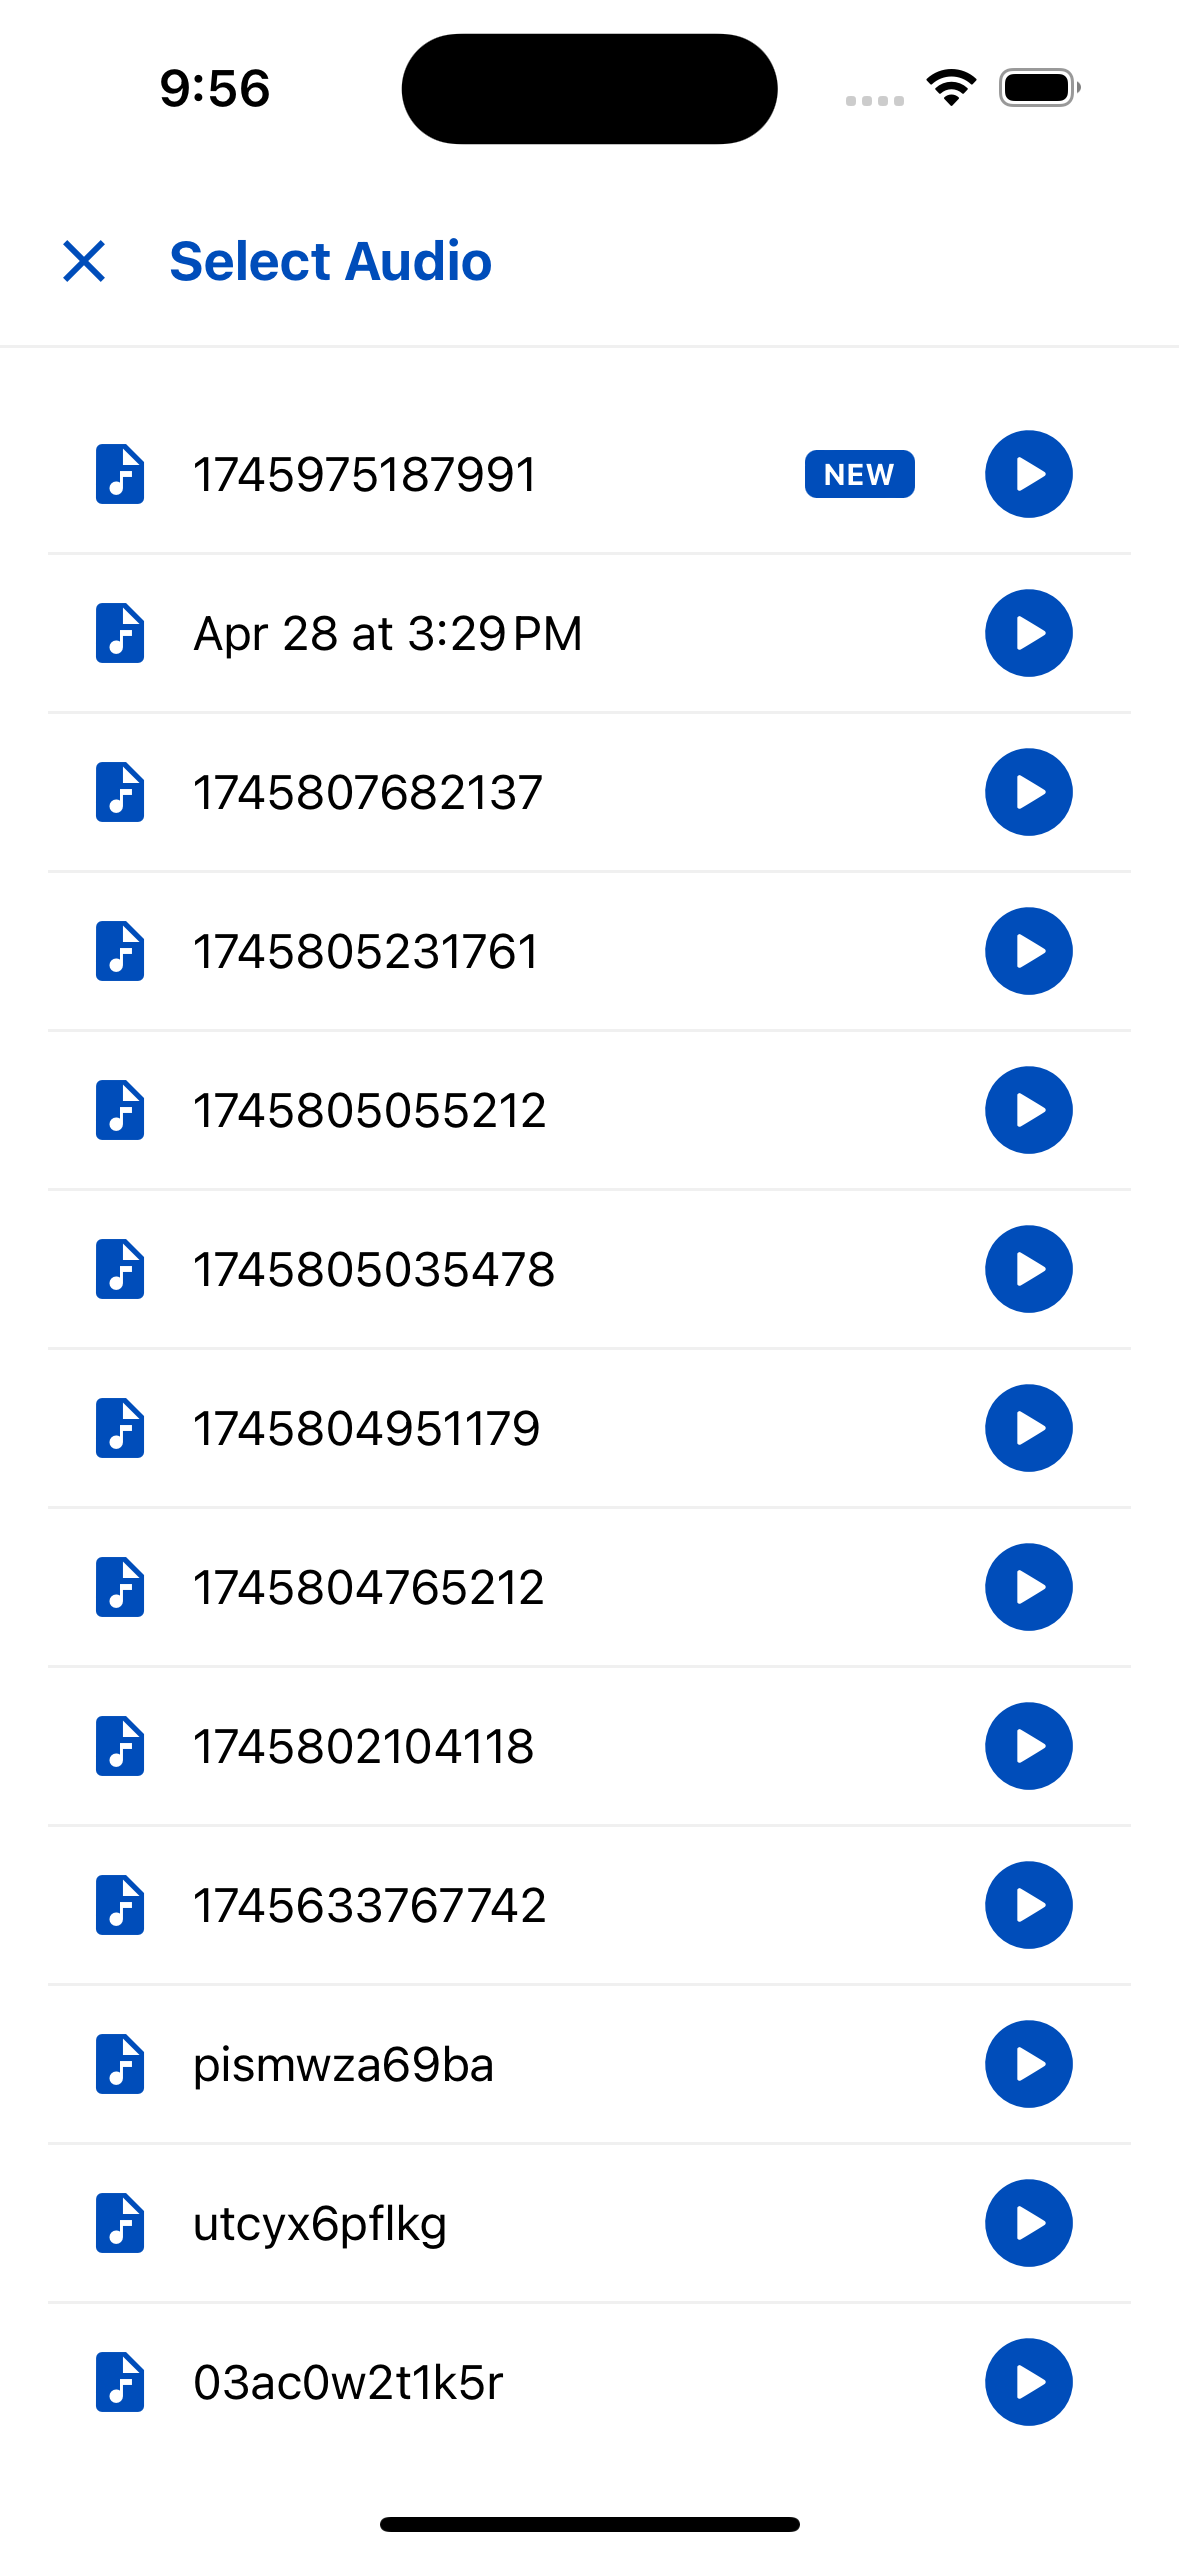
9. Adding Audio from Saved Recordings
Reuse previously recorded or generated audio clips in new videos.
- After creating a video, tap the Add Voice-to-Video button
- Tap the list icon ☰
- The Original Actors Audio modal will appear
- Browse through your previously saved audio clips
- Tap the play button to preview an audio clip
- Tap Select to use the chosen audio
- The selected audio will be loaded into the audio player
- Proceed with lip-syncing if desired
Pro Tip: Create a library of standard audio clips for intros, outros, or common phrases to quickly add them to new videos.
10. Deleting Actors (Long Press)
Remove actors you no longer need from your collection.
- Go to the My Actors section
- Find the actor you want to delete
- Long press (press and hold) on the actor's thumbnail
- A confirmation dialog will appear
- Tap Delete to permanently remove the actor
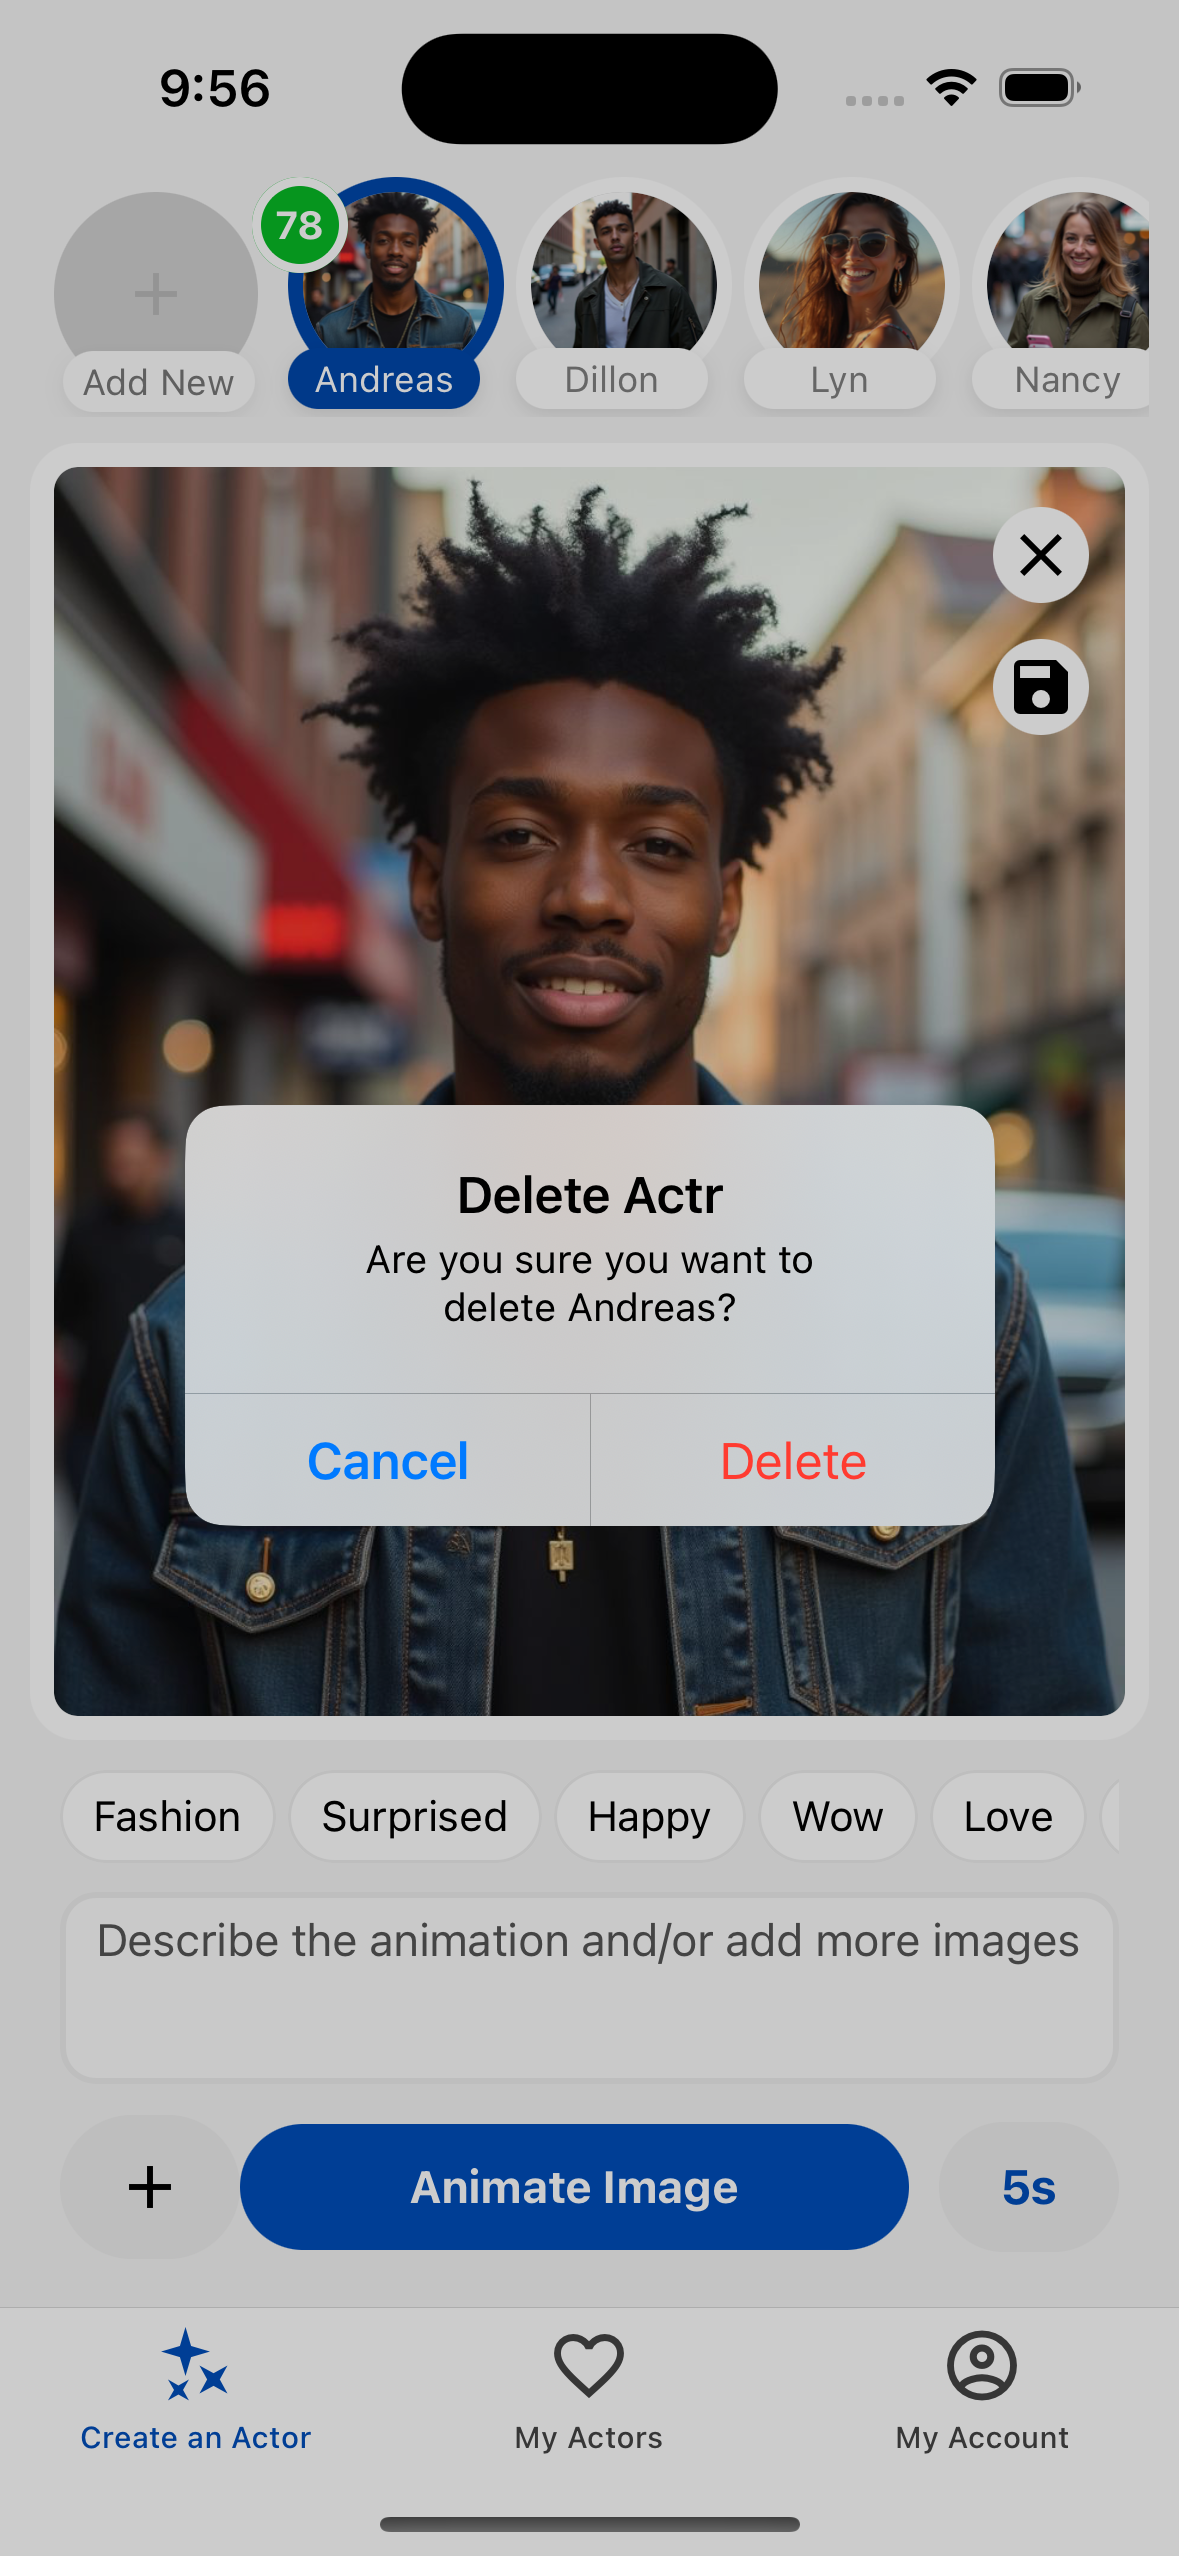
Warning: Deleting an actor is permanent and cannot be undone. All associated videos and images will also be deleted.
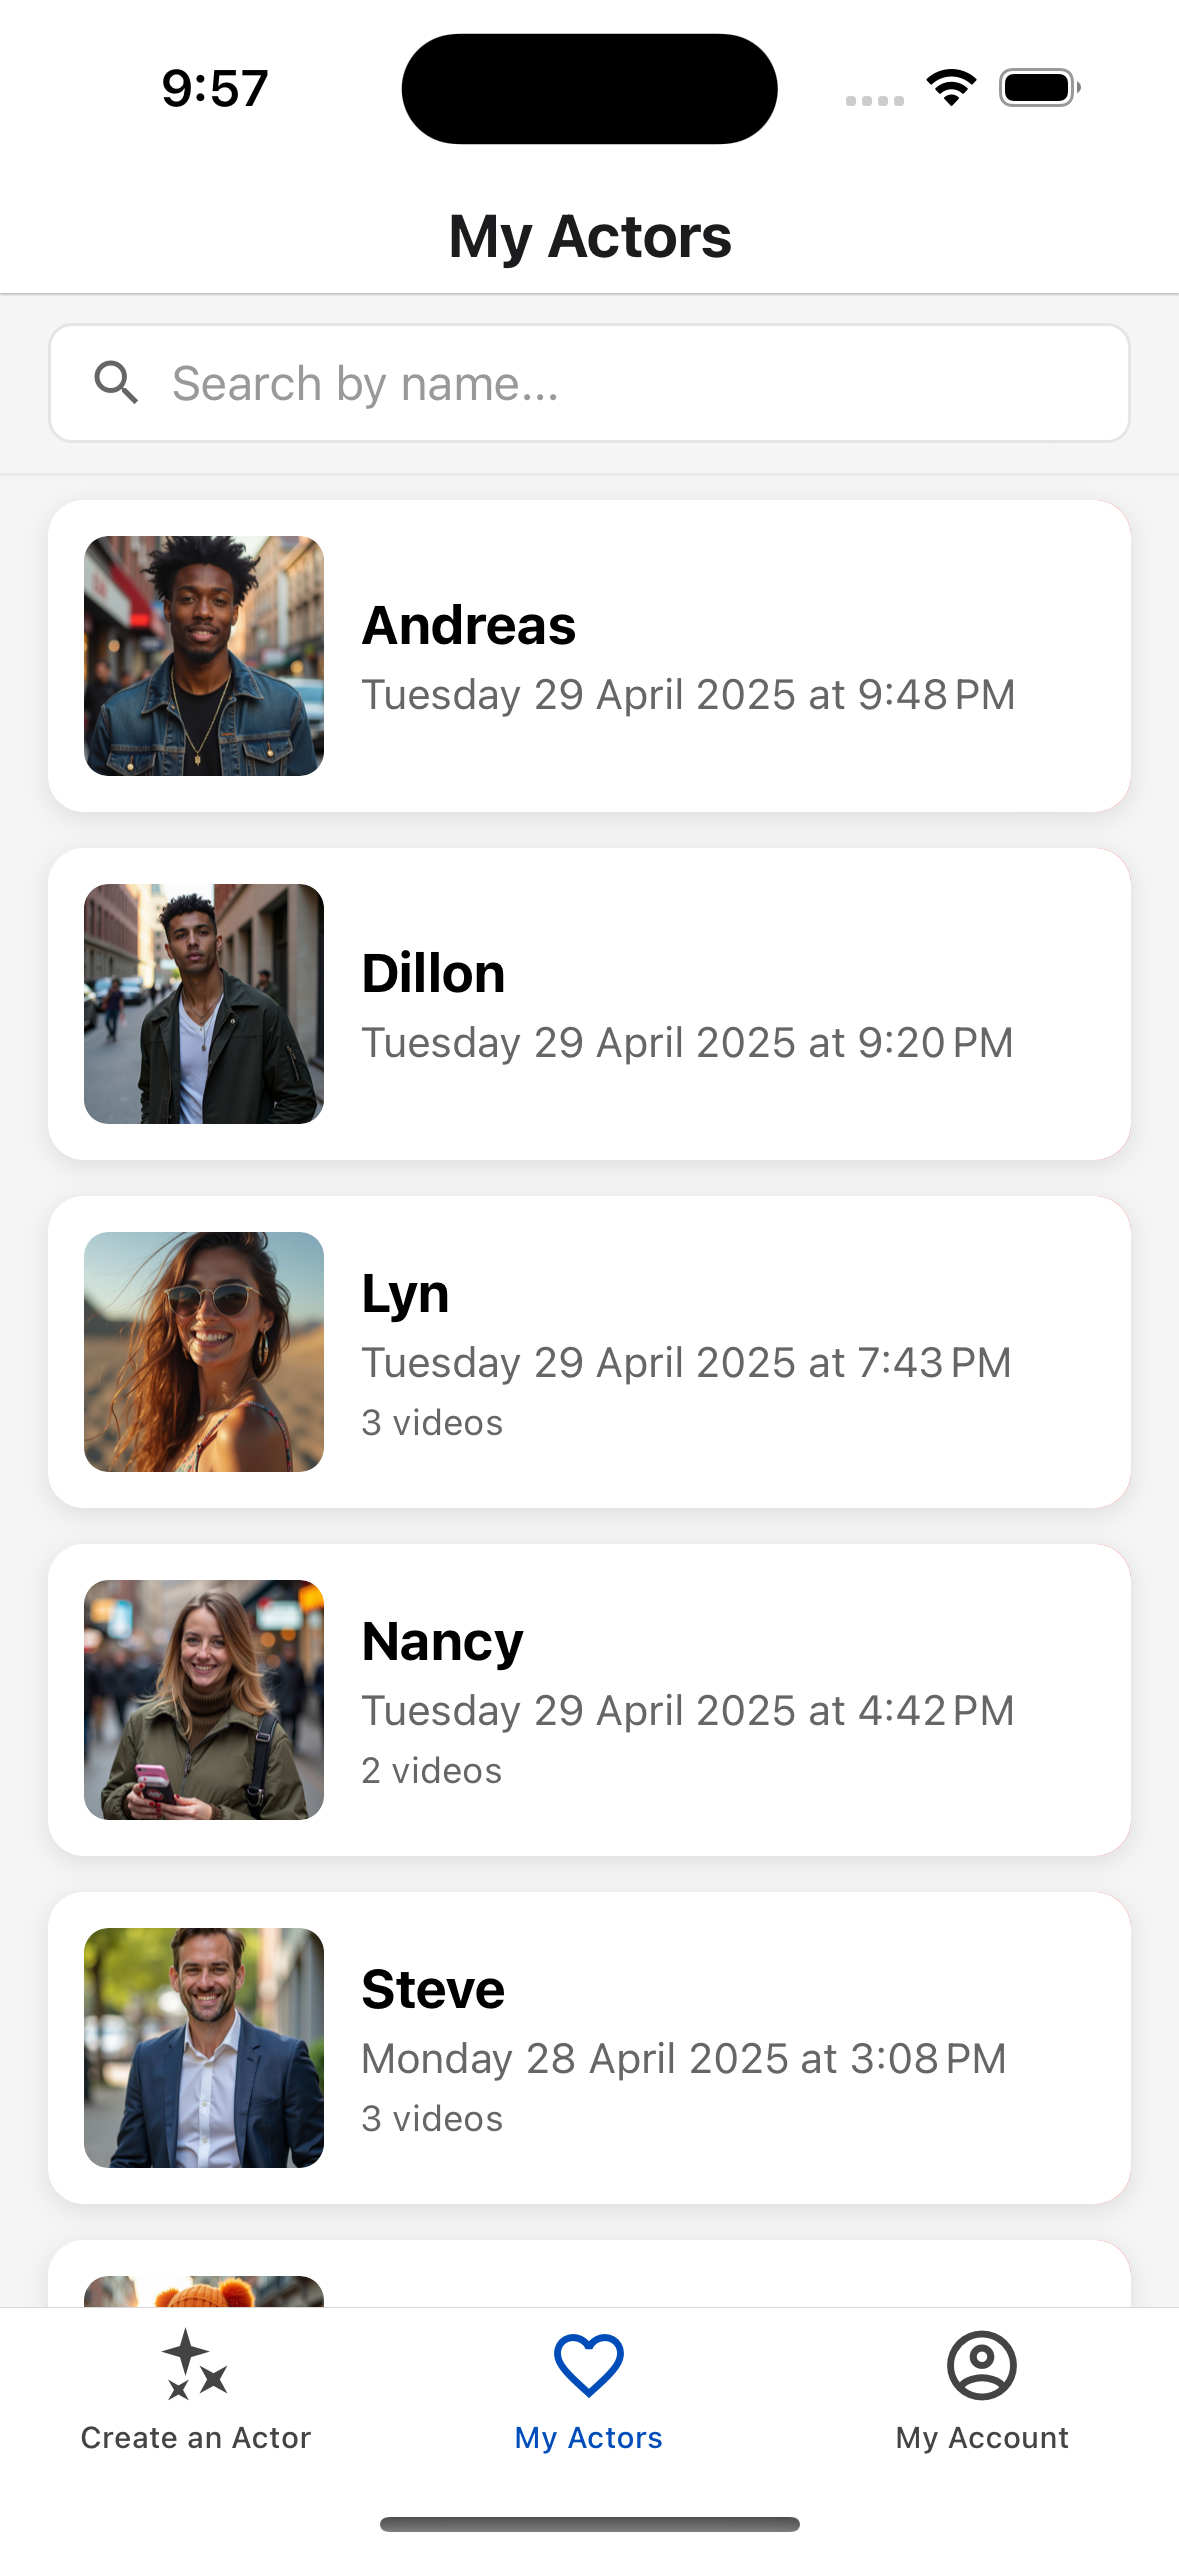
11. Viewing All Saved Actors
Access your library of created actors for easy reuse.
- From the main screen, tap the actor gallery icon in the bottom navigation
- Browse through all your saved actors
- Tap on an actor to select it
- You can now edit, animate, or delete the selected actor
Organizing your actors:
- Give your actors descriptive names for easy identification
- Create different actors for different types of content
- Regularly clean up unused actors to keep your library organized
Need More Help?
If you have any questions or need additional assistance, please visit ourdetailed documentationor contact our support team atinfo@actr.app.